GUI workflow
Welcome to Polemarch GUI
In this section of our documentation we will tell you about Polemarch GUI’s opportunities.
Let’s begin with Dashboard page:
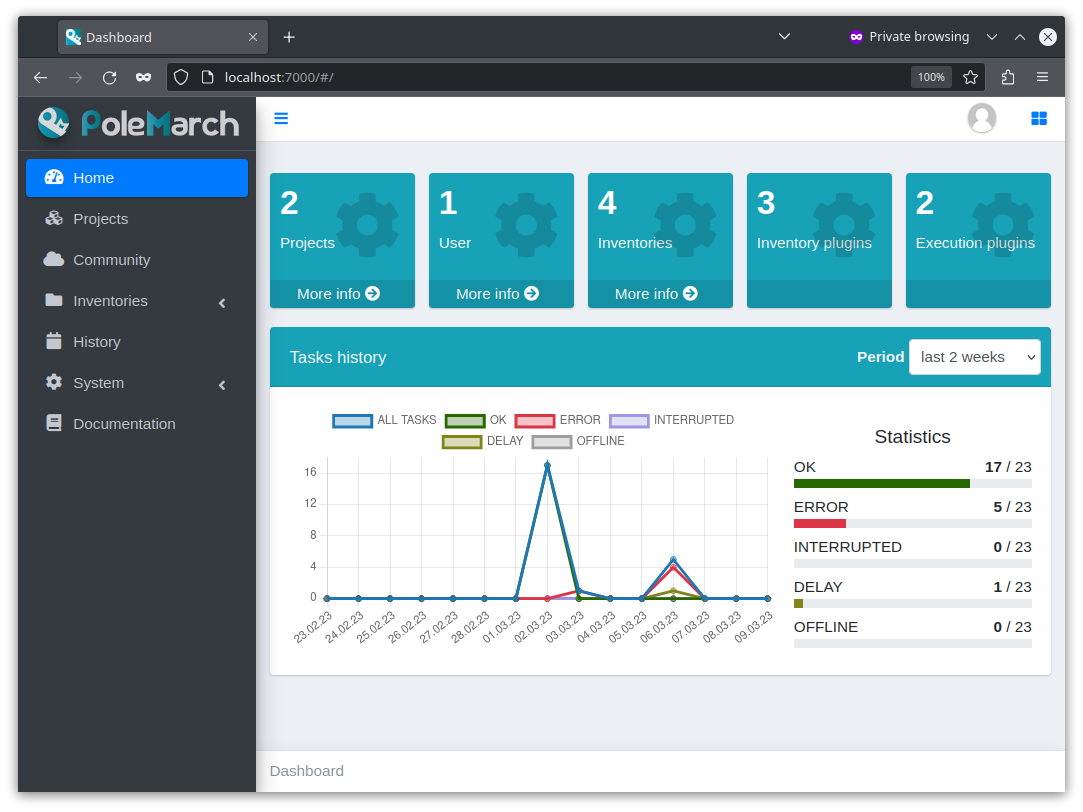
As you can see, Polemarch GUI provides user with 2 menus:
the first one is located in the left sidebar and it is aimed to provide user with navigation between main system objects, like projects, inventories, history records and etc.
the second one is located at the top of browser window and it is aimed to navigate user to API section, to user’s page and to logout page.
Also there are some widgets on content block of Dashboard page. For example, there you can check the statistics of your tasks for different periods of time.
Before you start
Before you can do any job with Polemarch you should create at least one project, because all Polemarch’s functions are linked to the project.
Projects
So, to start your work with Polemarch you should create project. To do this, you need to select ‘Projects’ in the left side menu and click the Create button.
There are 3 project types in Polemarch:
GIT - Polemarch can sync with your git project.
TAR - If you don’t have git repository, you can upload tar archive with project files from any http url.
MANUAL - Empty project. This kind of project will be appropriate for you, if you want run only modules without any playbooks or something. Polemarch will create folder for your project files in projects_dir (you can specify it in settings) named as project id (you can see at URL), where you place manually your project files (like playbooks or something).
Let’s look at the example of GIT project’s creation:
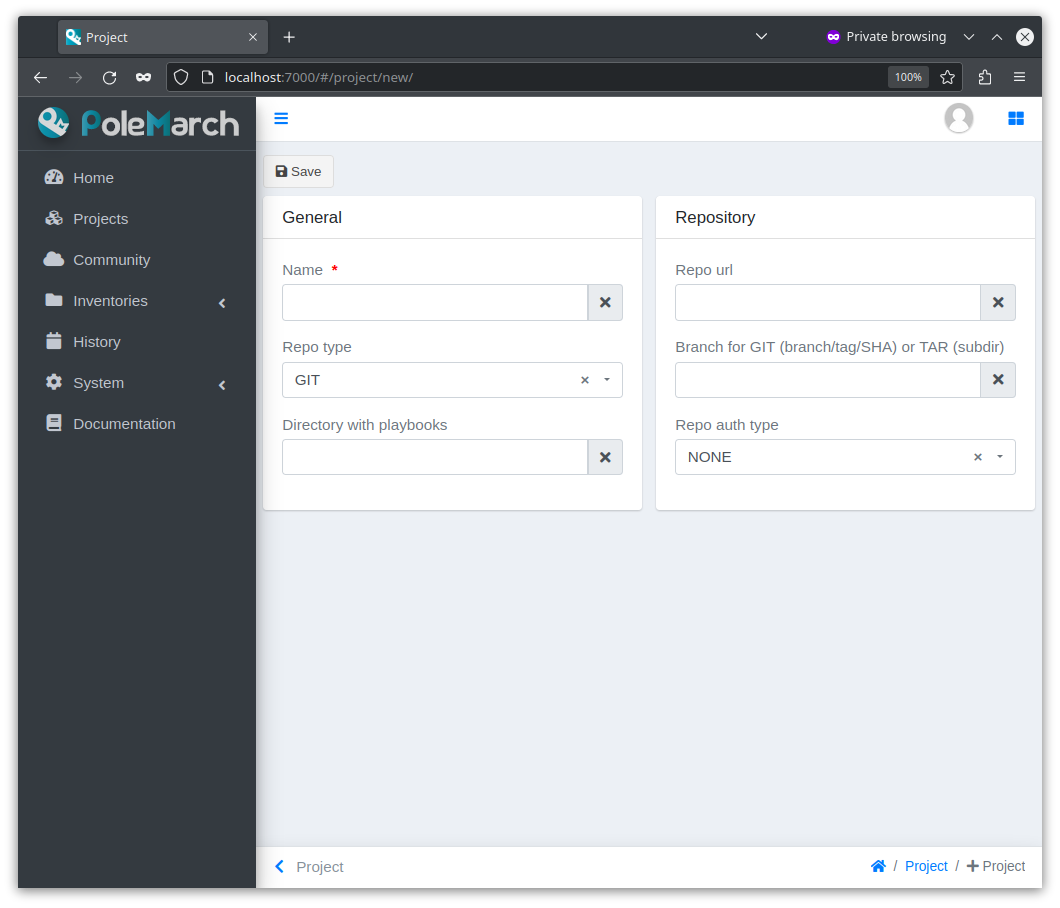
As you can see, the form of new project creation consists of 7 fields:
General:
Name - name of your project;
Repo type - type of project repository (GIT, TAR, MANUAL);
Directory with playbooks - you can specify the path to the directory with playbooks.
Repository:
Repo URL - URL to your repository;
Branch for GIT (branch/tag/SHA) or TAR (subdir) - you can specify the branch you want or leave this field blank to get the default branch;
Repo auth type - type of authentication (NONE, KEY, PASSWORD);
Repo auth data - key or password value (if you choose KEY or PASSWORD authentication type);
Before we continue talking about the structure of our project, we used ansible best practice and run playbooks from project:
ansible.cfg- used to setup settings. For detailed information about configuration file read settings reference.If you setup modules directory, we import all modules from this directory and set name
polemarch.project.[module_name].Playbook - import all files with
.ymlextension from root directory of the Project.If you need to set variables globally, not only for run, you can use
group_varsandhost_varsin root directory of project.
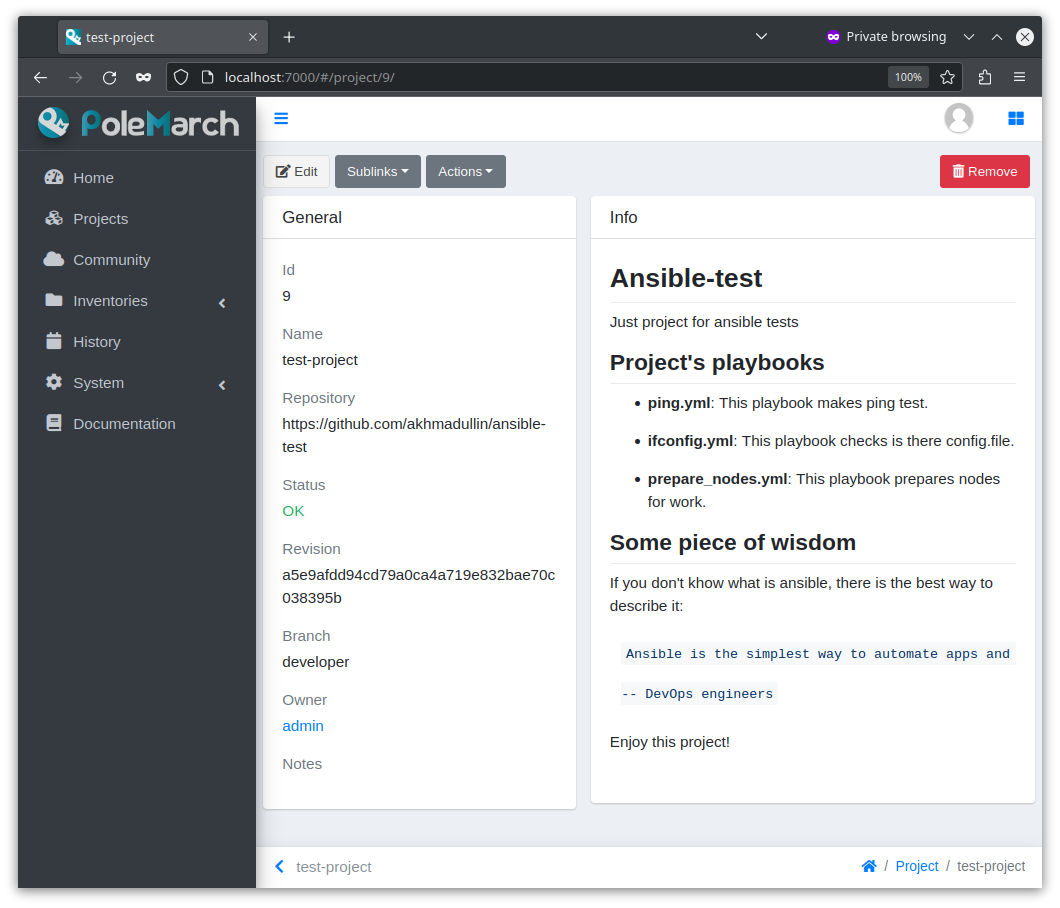
After project creation you’ll see the next page:
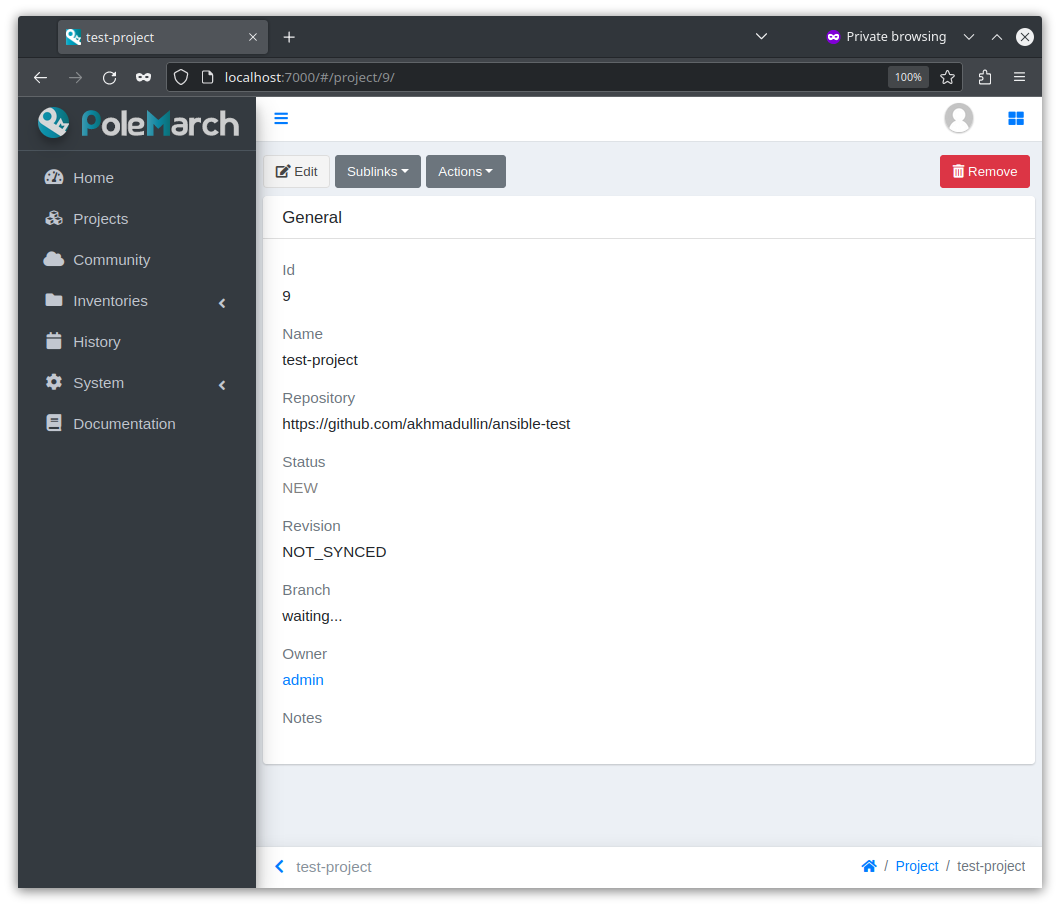
As you can see there are some new fields on this page:
Id: the unique key of object in database.
Status: Polemarch project status. Possible values are:
NEW - newly created project,
WAIT_SYNC - repository synchronization has been scheduled, but has not started to perform yet,
SYNC - synchronization is in progress,
ERROR - synchronization failed,
OK - project is synchronized.
Revision - GIT project revision.
Branch - branch of your GIT project, to what your Polemarch project was synced.
Owner - user, who owns this project.
Also there are some new buttons:
Edit - this button turns on edit mod for this page;
Remove - this button deletes project.
Sublinks buttons:
Ansible modules - this button opens project’s module list;
Ansible playbooks - this button opens project’s playbook list;
Execution templates - this button opens project’s template list;
History - this button opens project executions’ history list;
Inventory - this button opens project’s inventory list;
Variables - this button opens project’s variables list.
Action buttons:
Copy - this button opens “copy” action page;
Execute ansible module - this button opens “execute module” action page;
Execute ansible playbook - this button opens “execute playbook” action page;
Set owner - this button opens “set owner” action page;
Sync - this button syncs your Polemarch project with repository.
If you want to edit values of some fields on any page in Polemarch, you should click the Edit button to activate edit mode.
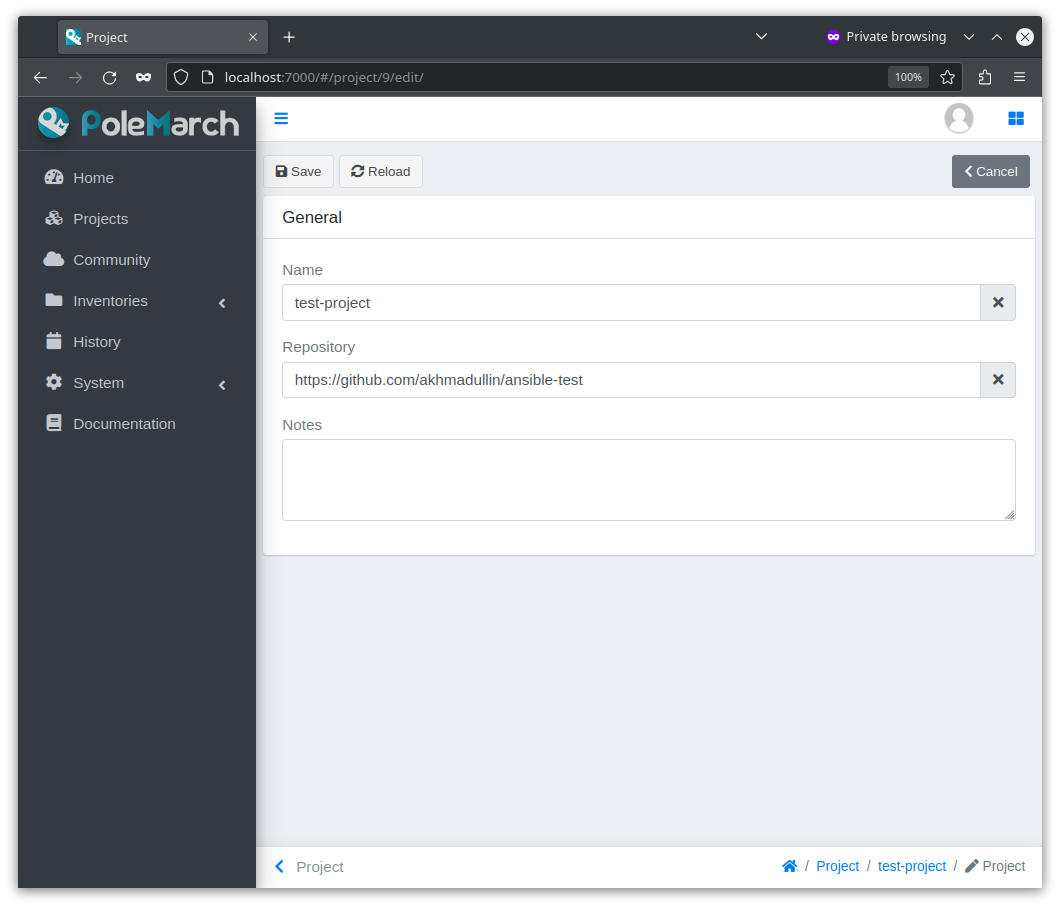
In this mode, you can change the project’s name, update the repository URL, and make notes about your project.
Save - this button saves all changes you have made on this page.
Reload - this button resets all changes that you have done on this page.
Now, let’s back to read only mode of our project page.
As you can see, now project’s status is “NEW”, so we need to click the Sync button to get all needed data from your GIT project.

Once your project status changes to “OK”, you can start working with Polemarch.
Warning
If you update something in your GIT repository, don’t forget to run sync in Polemarch for pulling your changes.
Warning
If you have trouble when cloning from local git repository, this may be caused by
protocol.file.allow setting that is set to user in your git config.
For more information please see
this topic.
One of the solutions might be:
git config --global protocol.file.allow always
Keep in mind that this command allows file clone globally at git level for all your projects.
Project variables
If you need to change some properties of your project (for example, branch, key or password of project), you can do it on the “variables” page of your project:
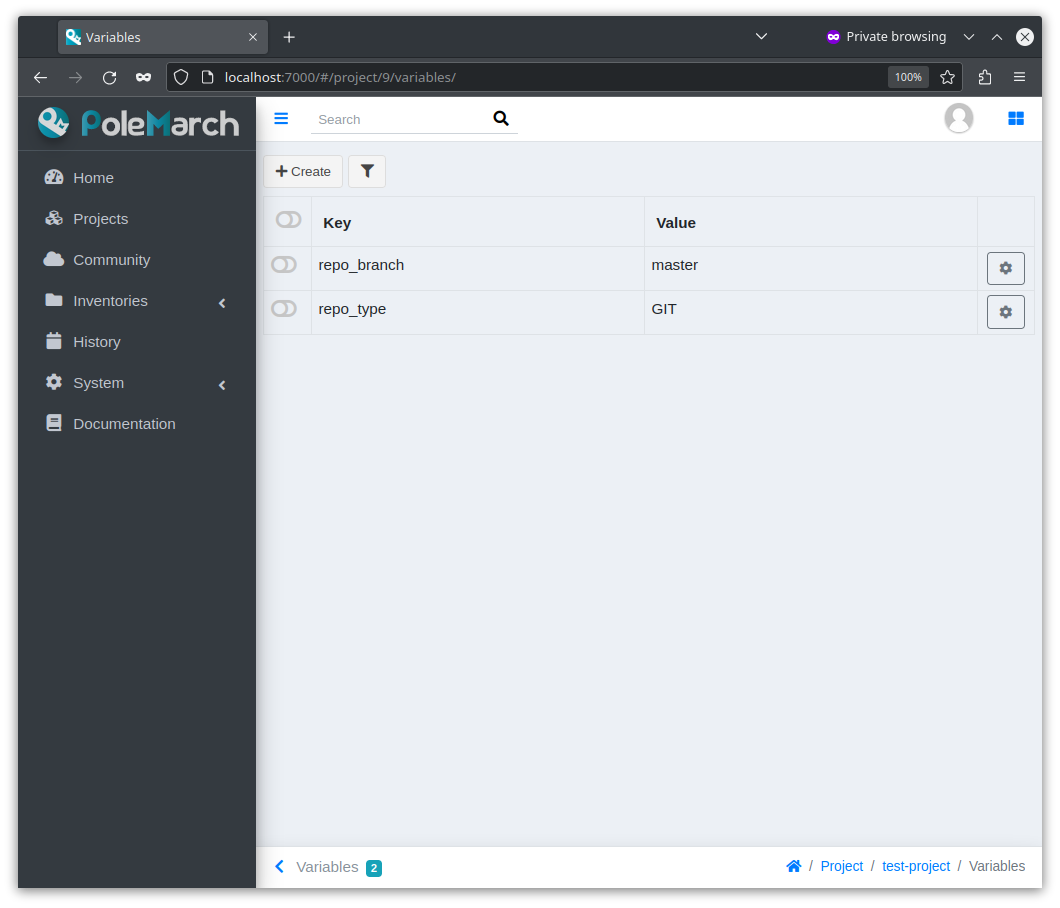
As you can see, now current project has only 2 variables:
repo_branch - branch of GIT repository;
repo_type - type of Polemarch project.
Other available project variables, that you can add with clicking the Create button:
repo_sync_on_run - boolean, if true, on every execution will be used project files obtained directly from the remote repository with revision specified in repo_branch, instead of current project stored in Polemarch.
repo_sync_on_run_timeout - time value after which attempt to clone project on execution will be stopped. Works only in conjunction with repo_sync_on_run.
Note
In case of GIT projects repo_sync_on_run_timeout limits time to whole cloning process. For example, if it set to 3 seconds and after 3 seconds project was cloned only on 70%, execution will be aborted.
This behavior is somewhat different with TAR projects. Timeout specifies how long Polemarch must wait until successfully establish connection with the server. After that download process will start and continue until it completes, regardless of repo_sync_on_run_timeout.
When working with MANUAL projects both repo_sync_on_run and repo_sync_on_run_timeout options do not applies.
repo_password - GIT repository password;
repo_key - GIT repository key;
playbook_path - path to playbook;
ci_template - runs the selected template during project synchronization;
Environment variables, with key starting from env_. For example env_test_var would create environment variable
test_varon run tasks from this project.
Note
You can add ANSIBLE_CONFIG environment variable by creating env_ANSIBLE_CONFIG variable in your project.
This will make your project to use specified config at every execution. Make sure that path is relative to project directory.
Let’s edit repo_branch variable. To do it you to need click the repo_branch item in list. Then you will see the following page:
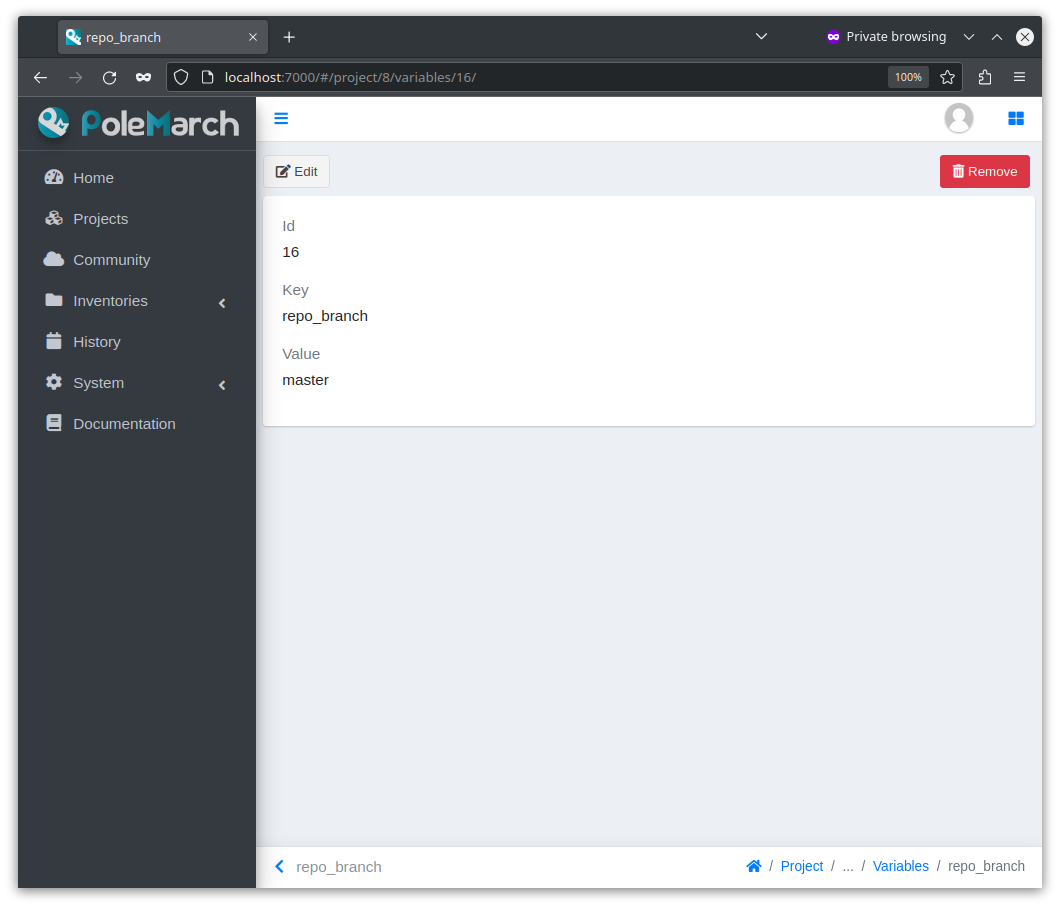
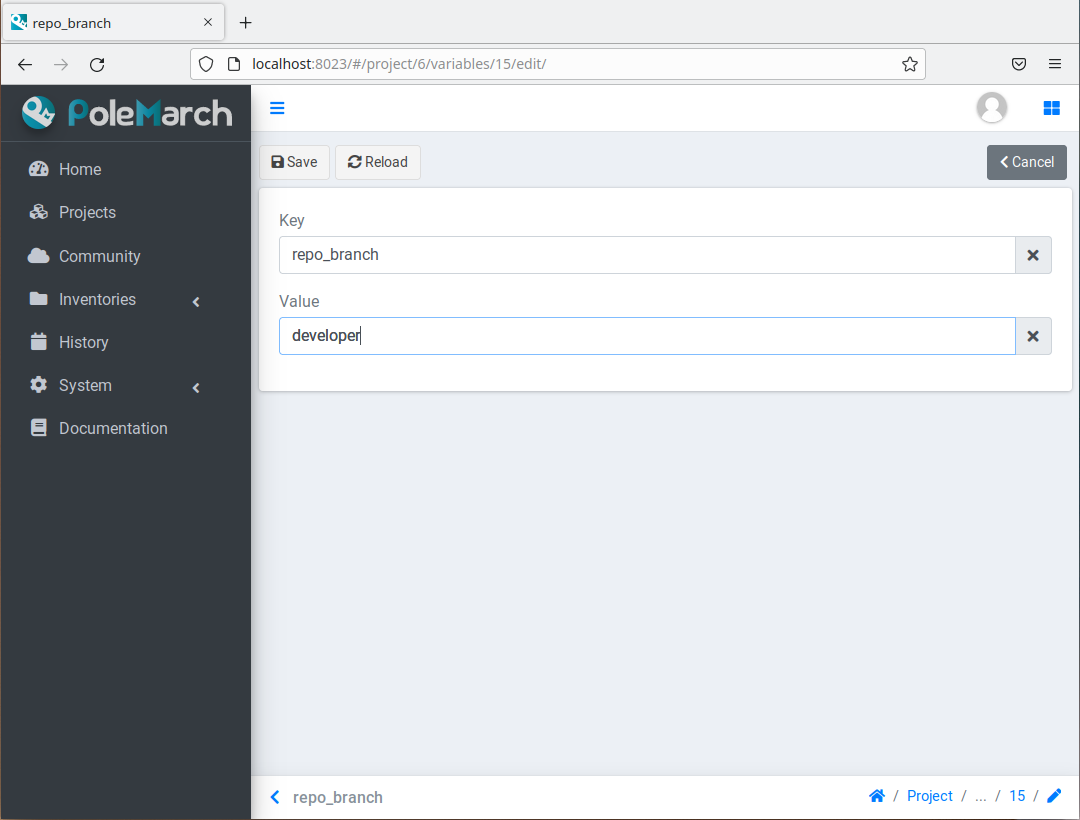
After clicking the Edit button you need to change branch name of ‘value’ field. Then click the Save button.
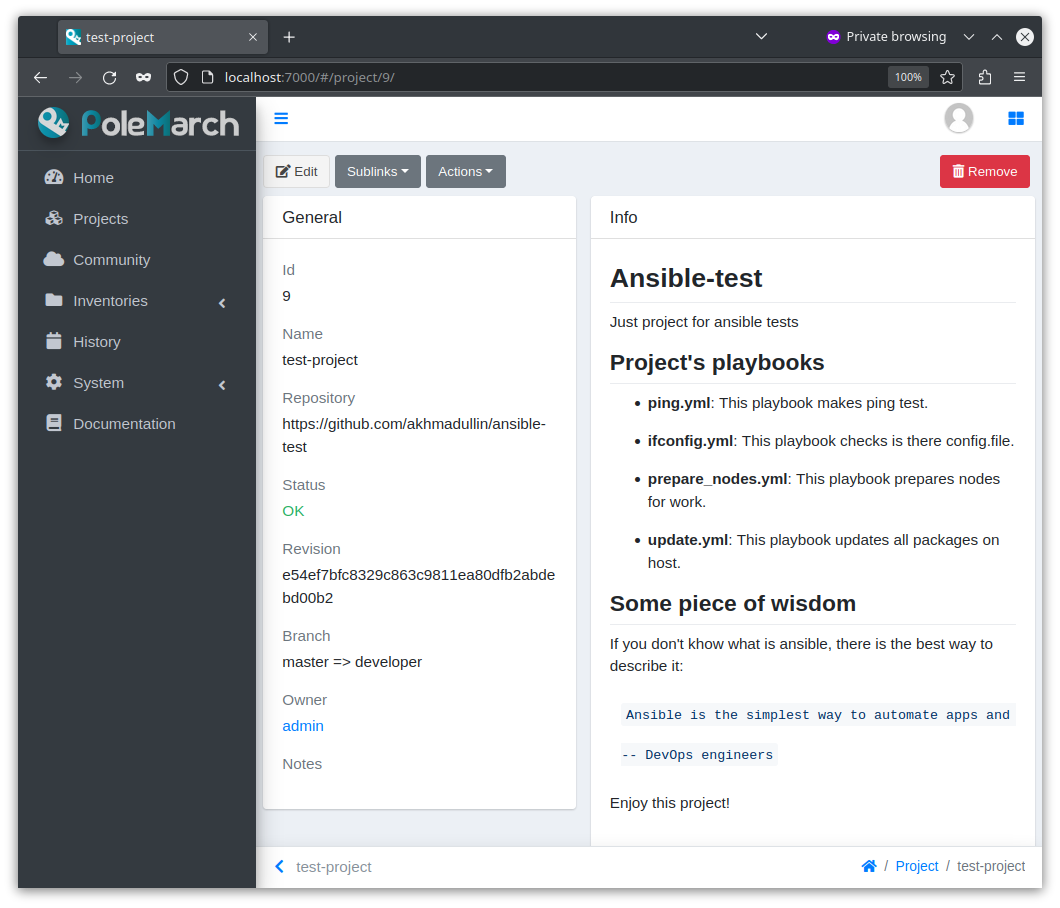
After changing of repo_branch variable you need to sync your Polemarch project to get files from selected branch. Until you synchronize the project, you’ll see in the “Branch” field your old branch and the new one.
Note
If your need to choose branch with tag name
you should use following format of branch name tags/[tag_name].
After successful project synchronization you will see selected branch name in ‘branch’ field:
Ansible Module execution
The simplest way to start using Polemarch is to execute ansible module. To make this action click the Execute ansible module button on project page.
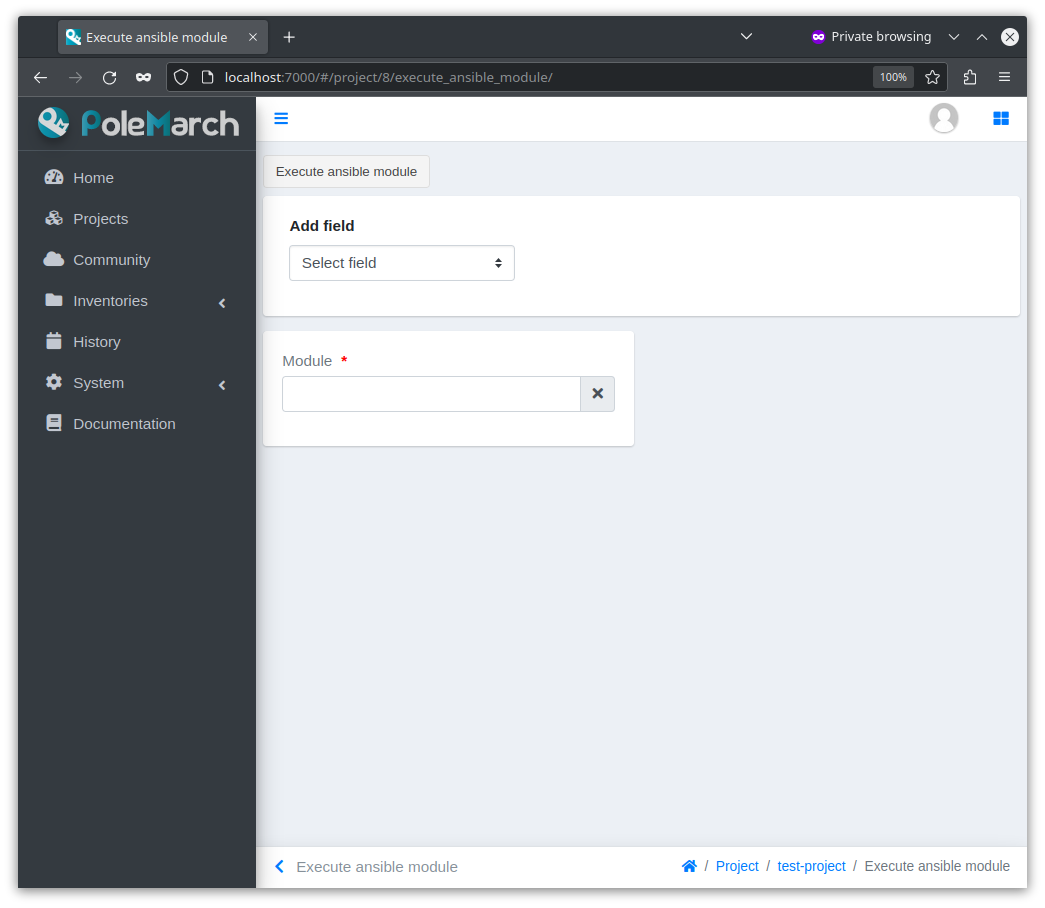
As you can see, there are two fields on this page:
Module - autocomplete field with the list of project’s modules.
Add field - add additional argument.
Also there is only one button on this page:
Execute ansible module - this button starts action execution.
For example, let’s execute module shell on localhost with argument uptime.
To do it we need to add next fields:
Inventory - it can be inventory from Polemarch system, list of hosts, that are separated by
,, or path to your inventory in project folder.Group - to which hosts from inventory execute this module.
Connection - type of connection.
Args - list of arguments for current module.
After all fields have been filled, our page started look like:
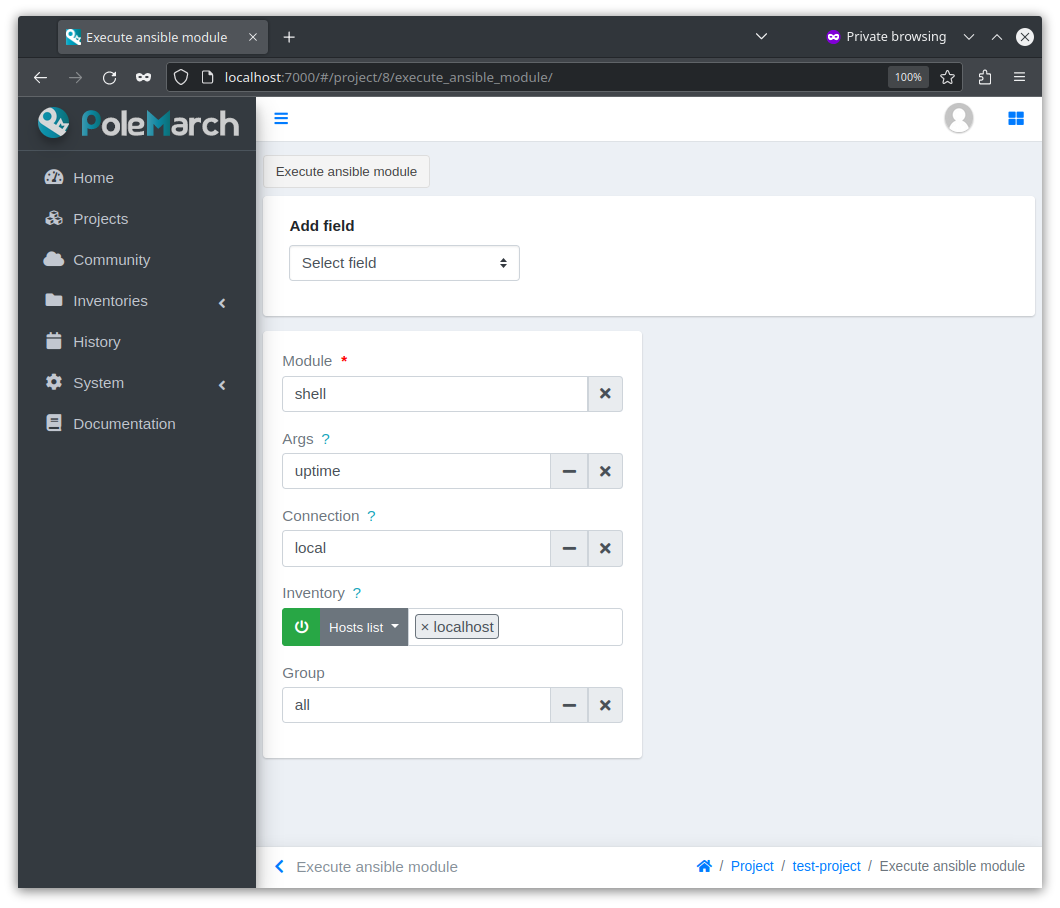
So, let’s execute our first task on Polemarch! To do it click the Execute module button.
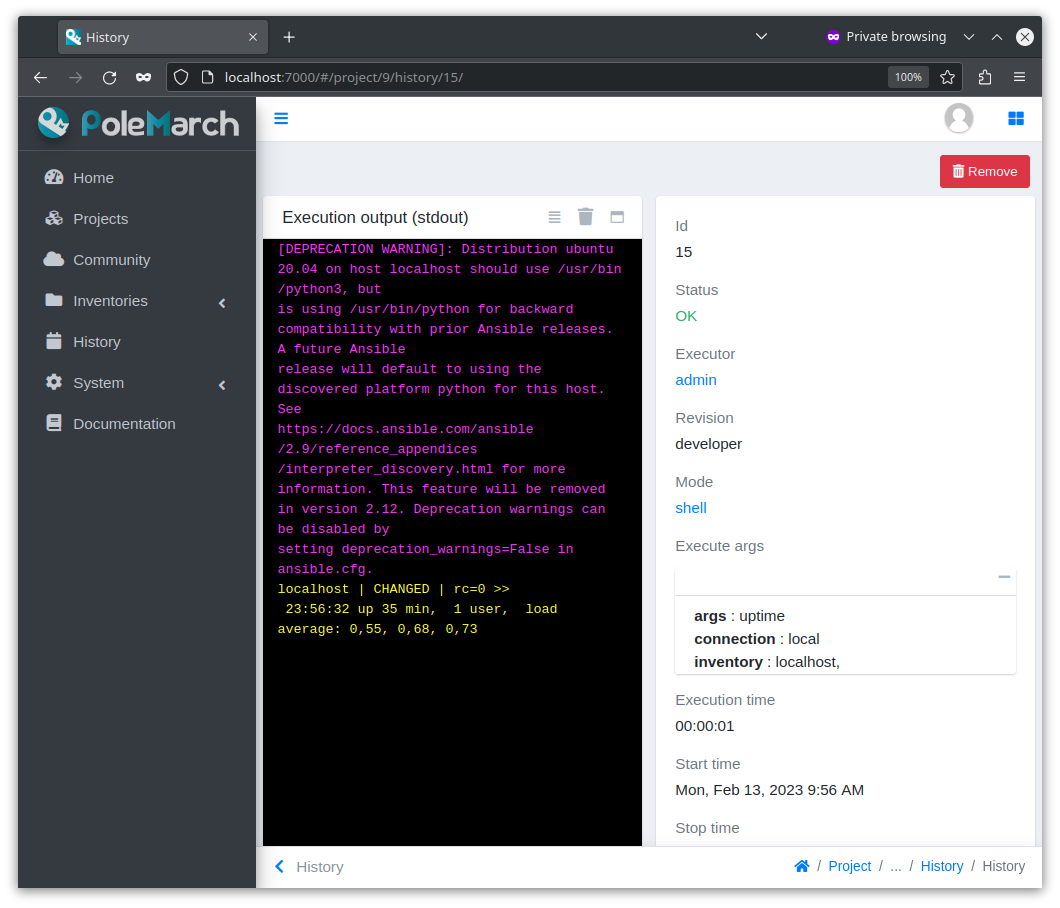
When status of your module execution changes to “OK” you will see the next page:
Execution templates
In previous abstract to execute module we needed to fill several fields. To do it before every module/playbook execution is rather inconvenient. In this case Polemarch templates save our time and nerves. Polemarch template is an object, that saves all options that user used during task execution.
For example, let’s create template which executes ansible playbook. To do it click the Execution templates button on project page. As you can see, there are no templates in the project’s template list now.
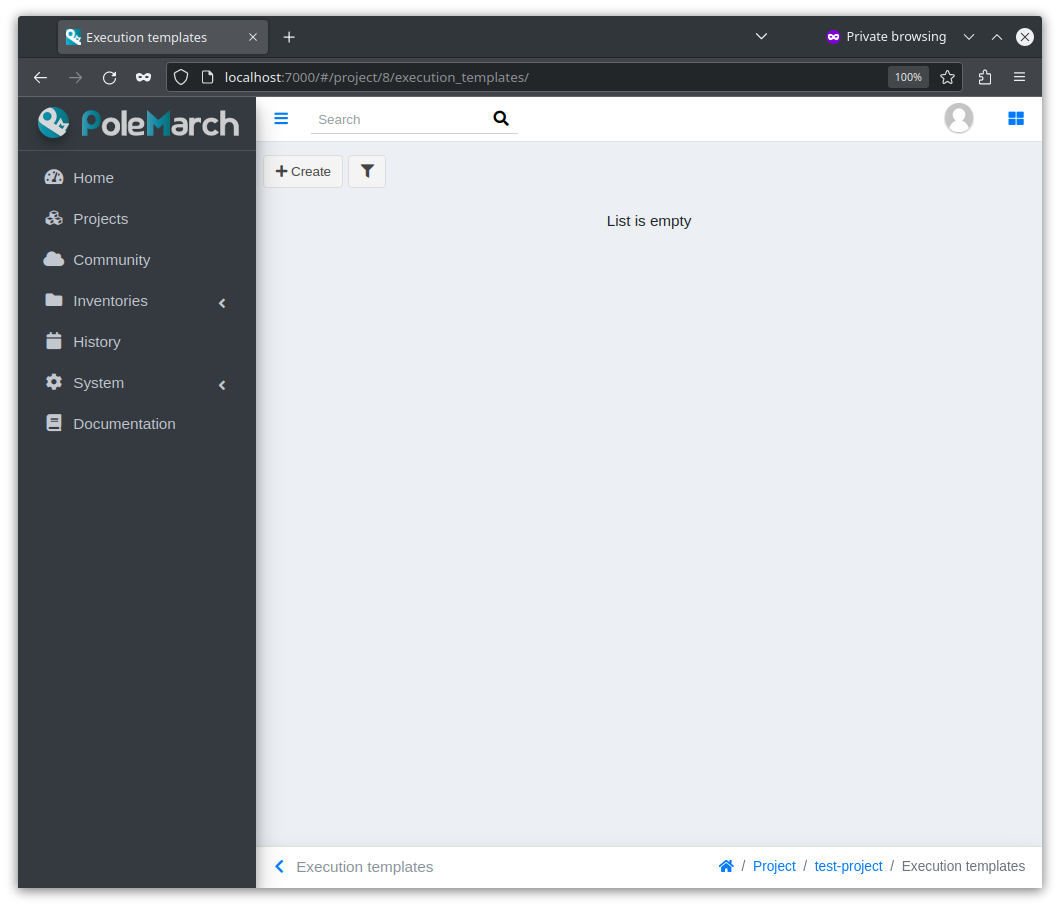
There is only one button here:
Create - this button opens the page for creation of new template.
To create template click the Create button on this page.
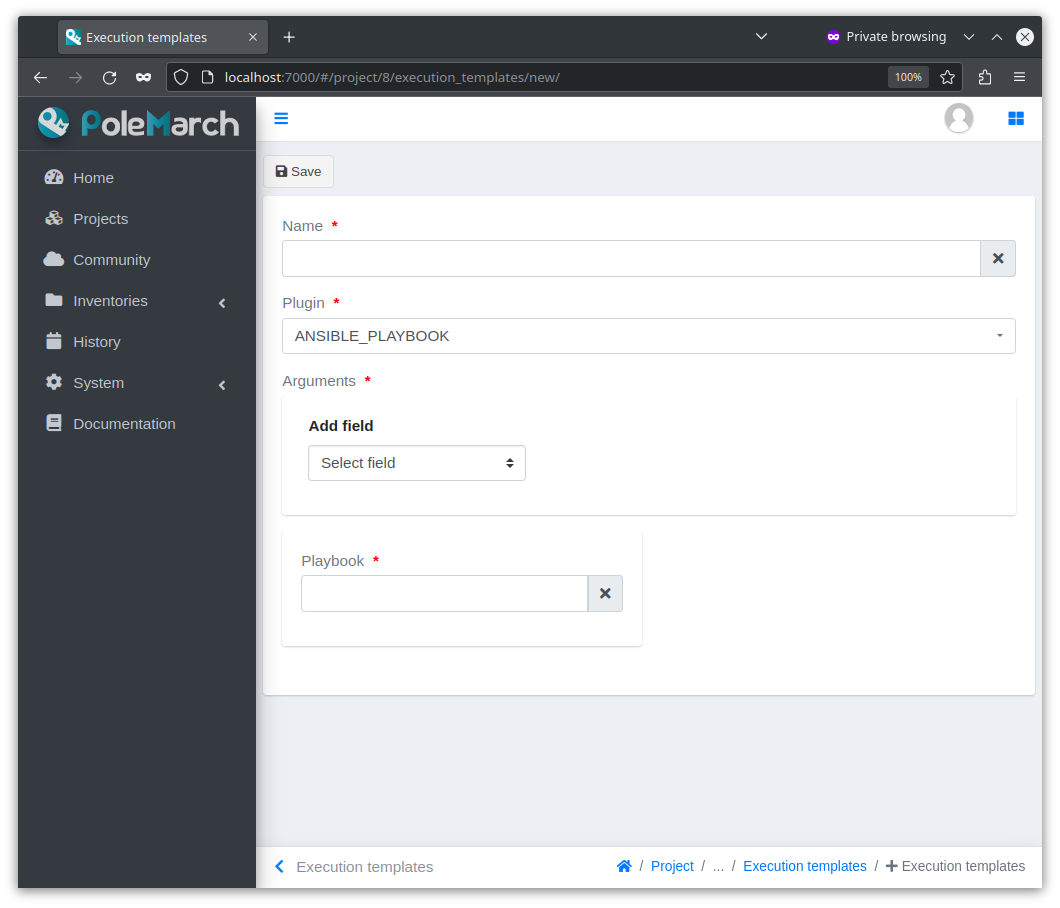
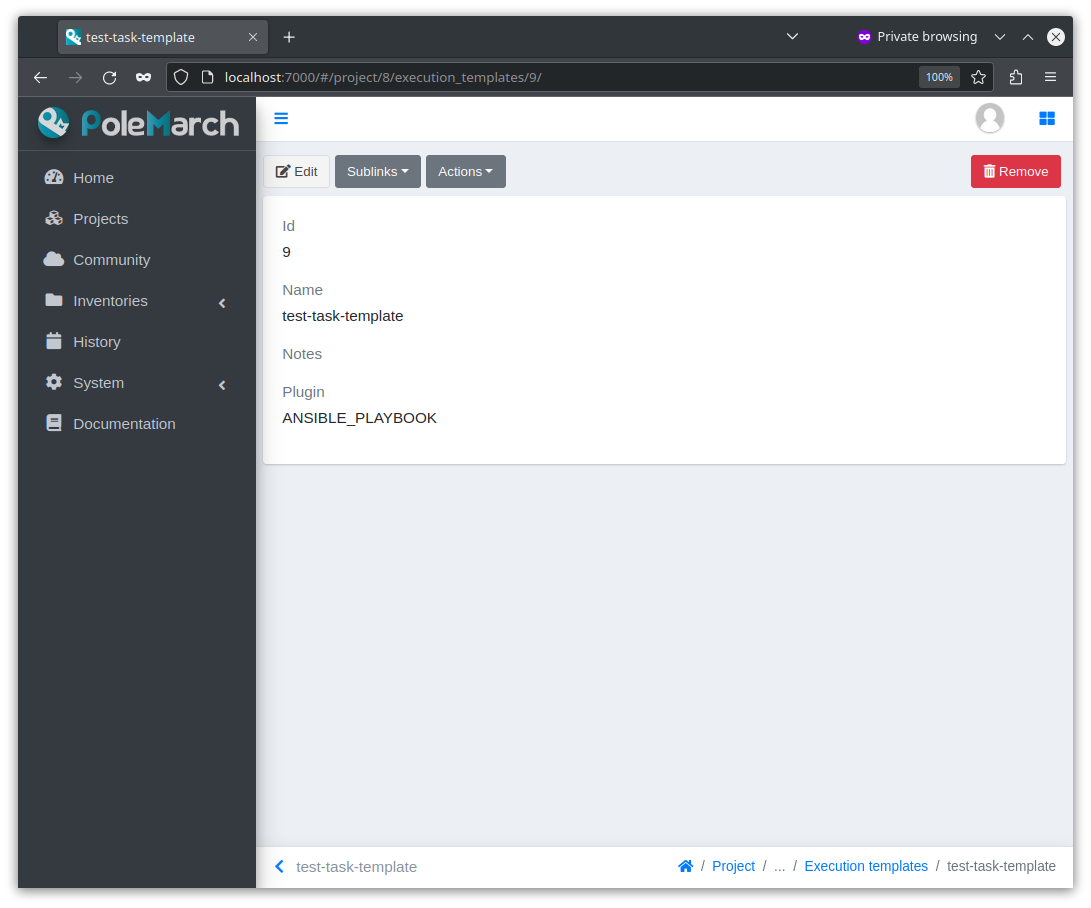
As you can see, there are several fields on this page:
Name - name of template at your choice.
Plugin - plugin which executes our task. There are two built in plugins: ANSIBLE_PLAYBOOK and ANSIBLE_MODULE allows you work with Ansible.
Note
You can create your own execution plugin allows you to run any shell command. If you’re interested in, checkout Execution plugins documentation.
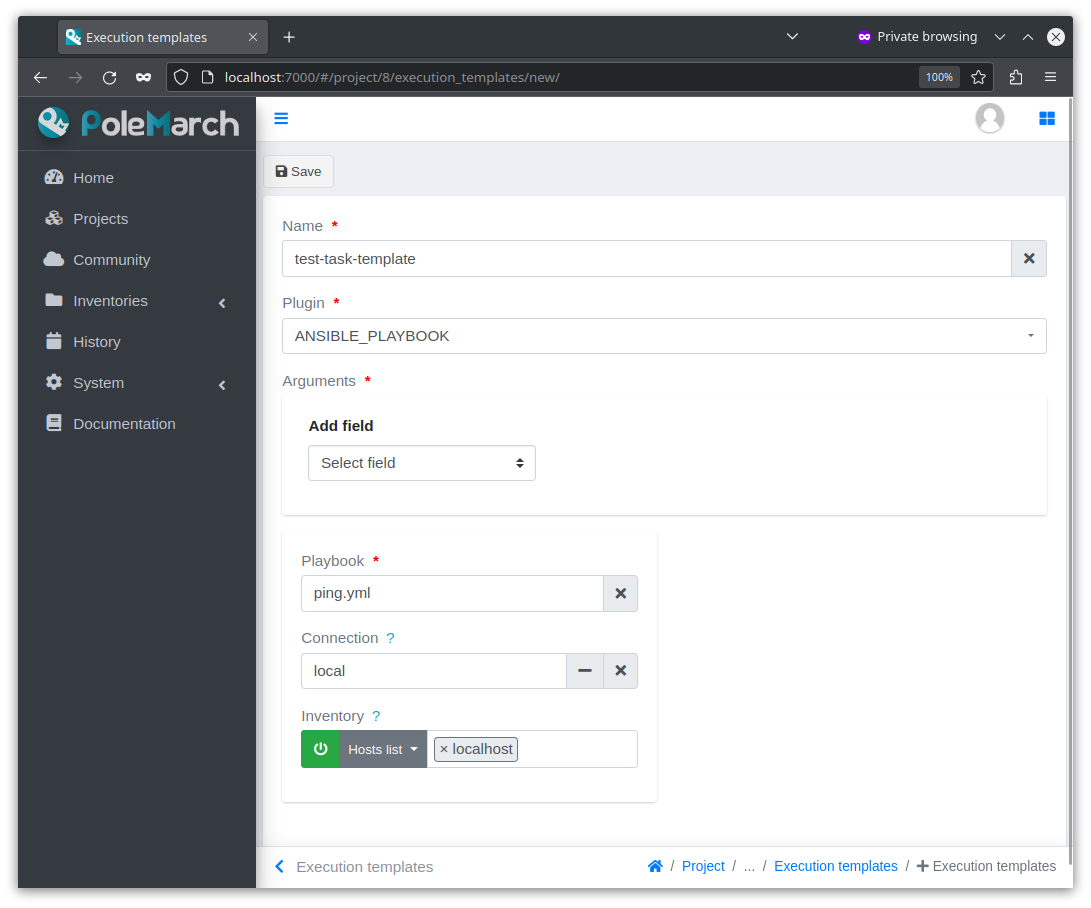
Playbook - name of playbook which will be used during execution.
Add fields - here you can add additional arguments for this template. In our case we’re going to use
inventoryandconnectionarguments.
After all fields have been filled, our page started look like:
After template creation you will see the next page:
Thought all our arguments are gone? Don’t worry. When you create a template, Polemarch also creates a default option that holds all arguments. Let’s check this out by going to Sublinks > Options:
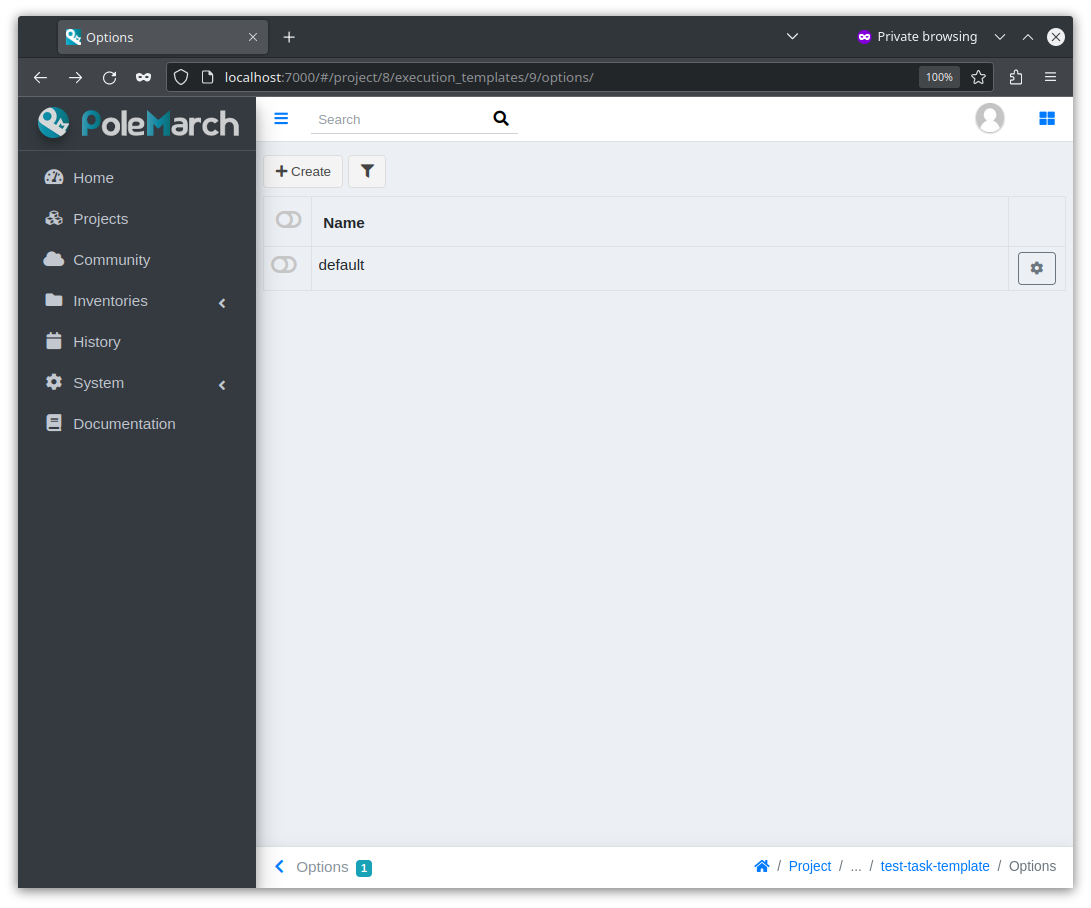
Here is the list of all options which our template can use. You can always create a new option. Let’s click on default:
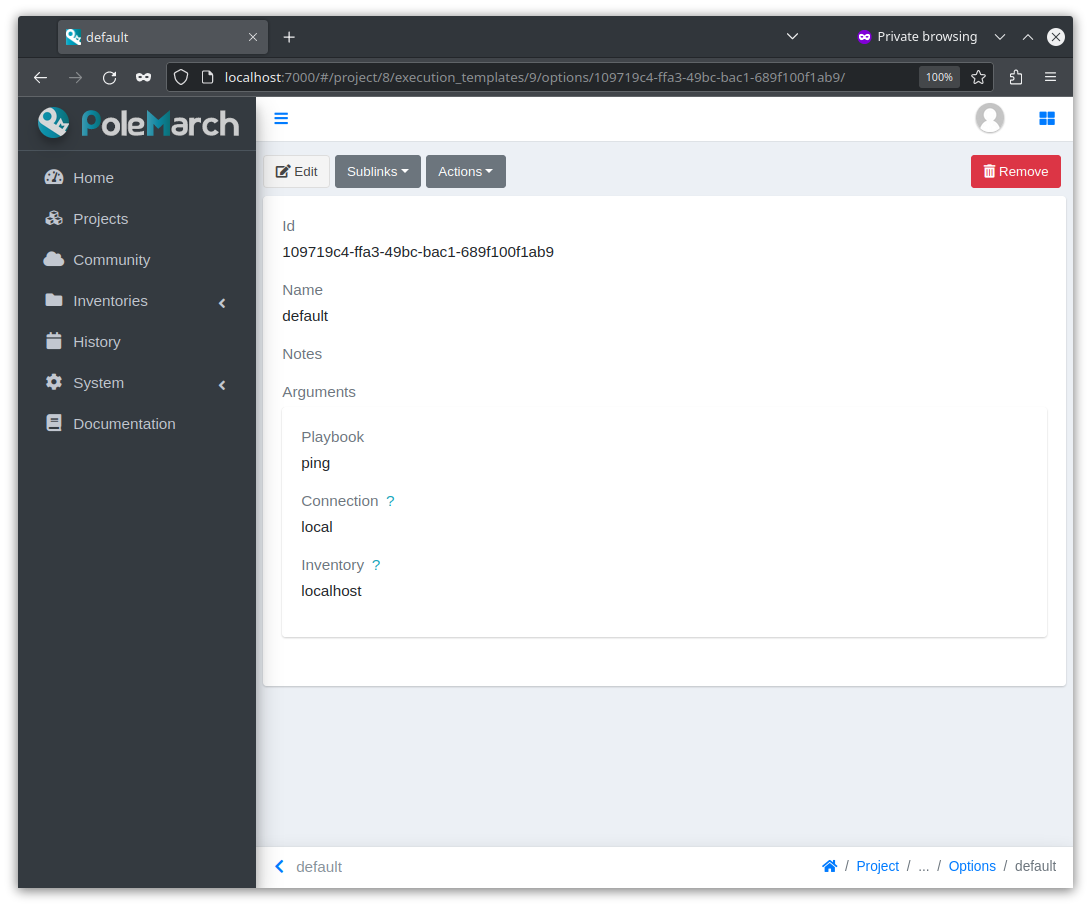
Now we are ready to execute our template. To do it you have two ways:
Being on the option page, click Actions > Execute
Being on the template page, click Actions > Execute, select an appropriate option and click Execute again.
These scenarios are identical. Use the one that suites you best.
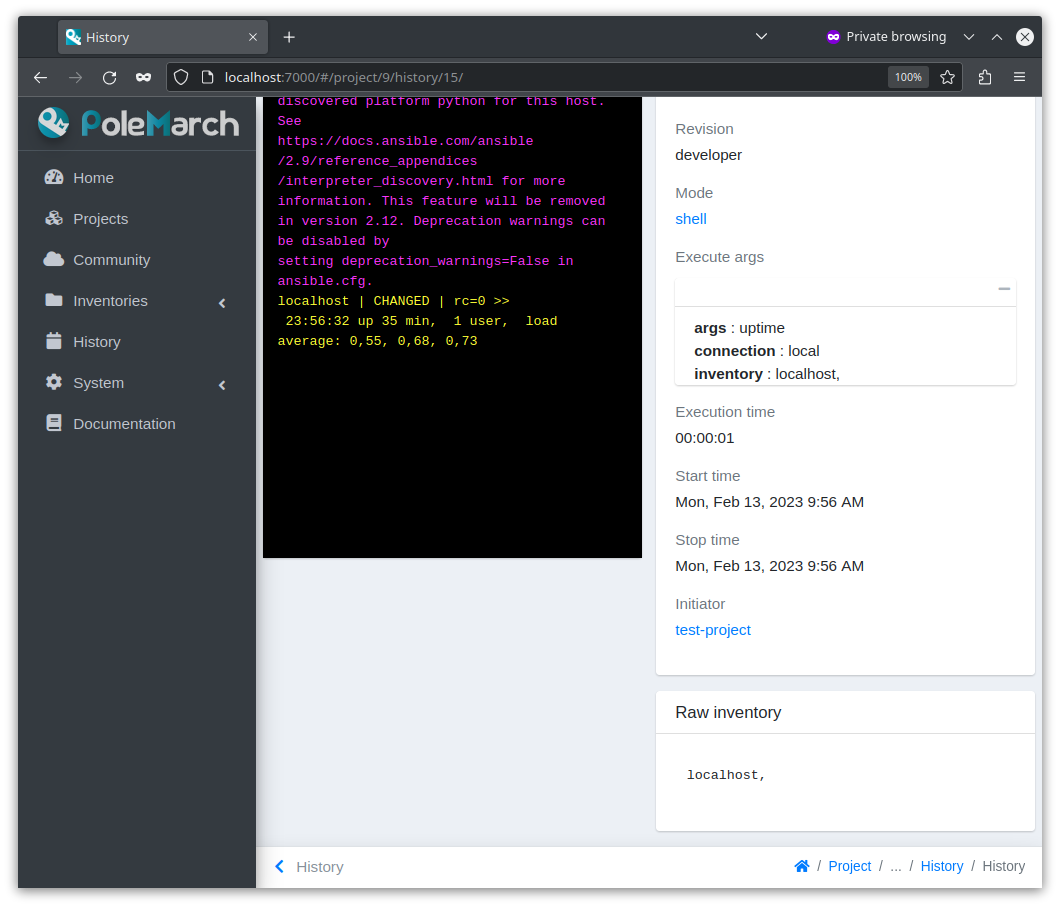
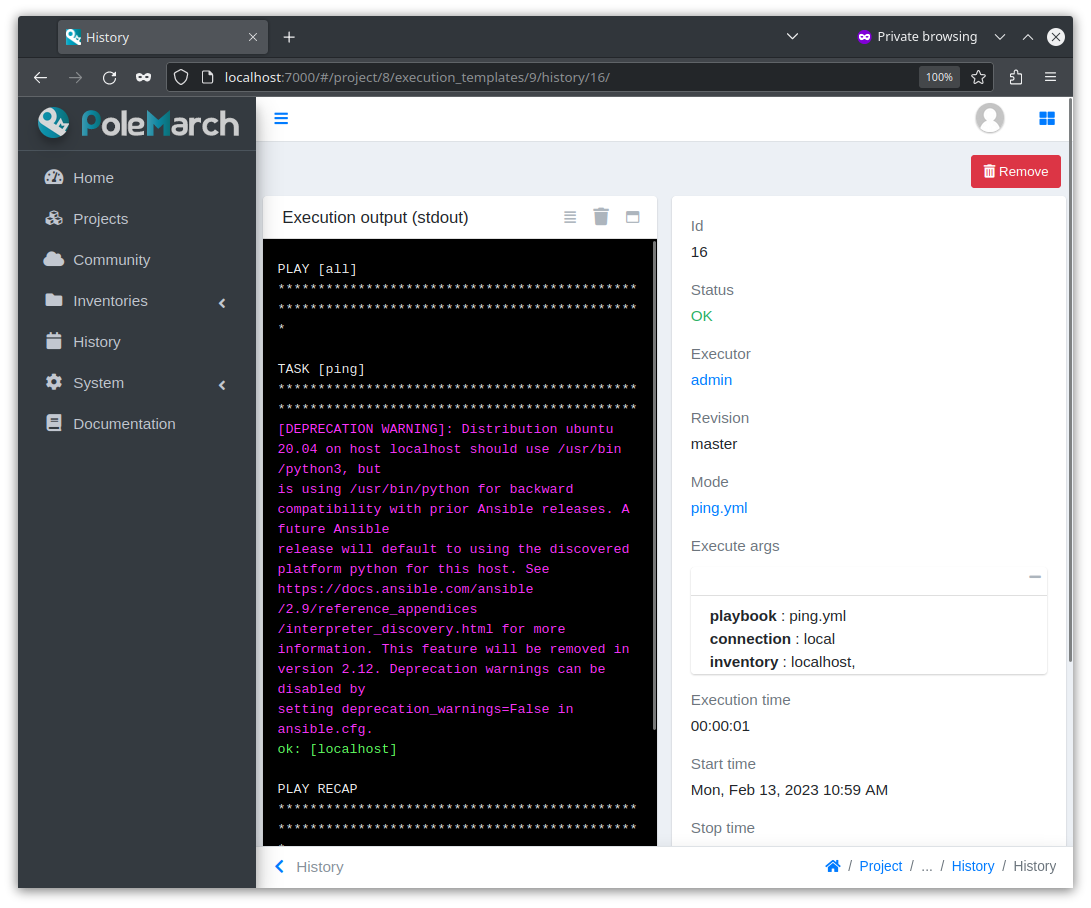
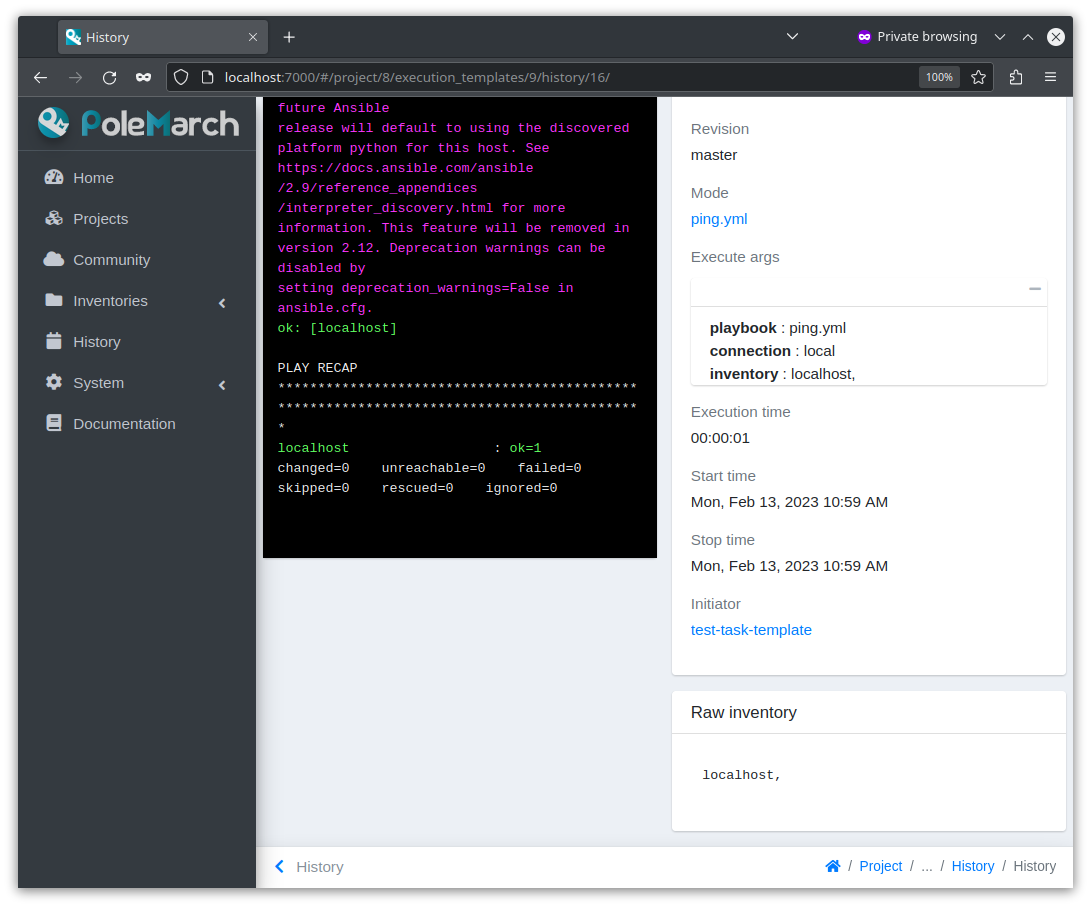
As we are already on the option page, let’s use the first approach. So, clicking the Execute gives us the execution history page:
Periodic tasks
Now let’s imagine, that you need to execute task with some interval or on the first day of month, for example, and you do not want to execute it every time by yourself.
For this case Polemarch has periodic tasks.
Polemarch executes periodic tasks regularly after specified period of time or by crontab schedule.
Remember our test-task-template from previous example? Let’s create a periodic task for it’s default option.
Click on the Sublinks > Periodic tasks.
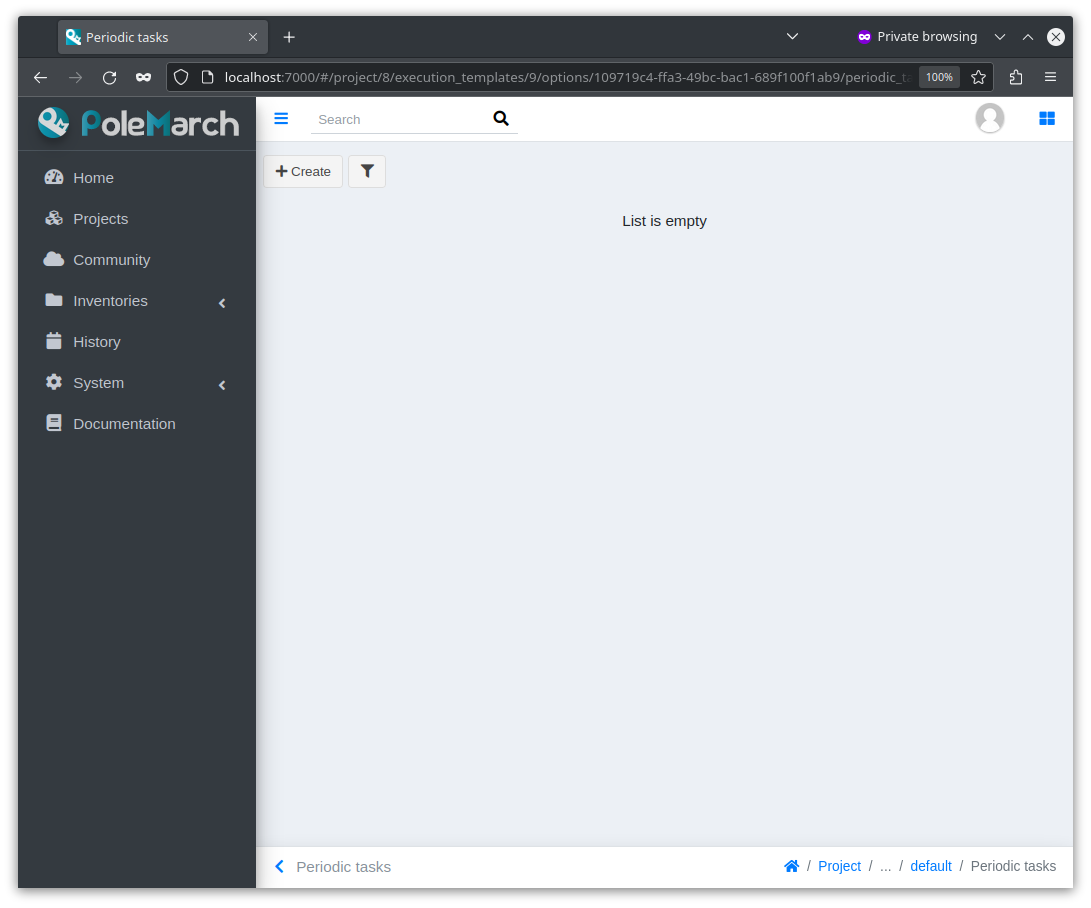
As you can see, there are no periodic tasks for now.
There is only one button here:
Create - this button opens the page for creation of new periodic task.
To create a periodic task click the Create button on this page.
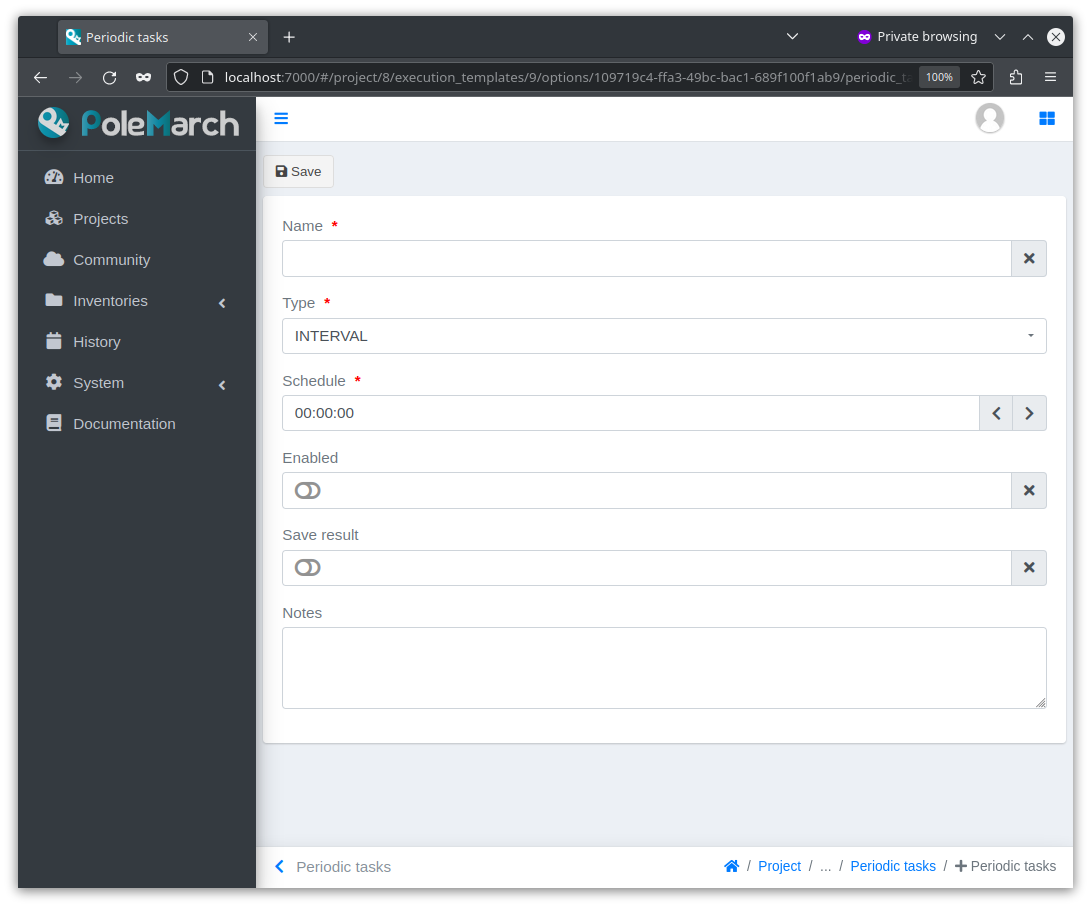
As you can see, the form of new periodic task creation consists of following fields:
Name - name of periodic task at your choice.
Type - type of schedule (INTERVAL or CRONTAB).
Schedule - value of execution interval.
If “type” is INTERVAL, task runs every time after specified interval has elapsed.
If “type” is CRONTAB, task runs according specified schedule.
Enabled - if active, the task will run, otherwise it won’t.
Save result - if active than each execution will generate a history page, otherwise it won’t.
Notes - not required field for some user’s notes, for example, for what purpose this periodic task was created or something like this.
After all fields have been filled, our page started look like:
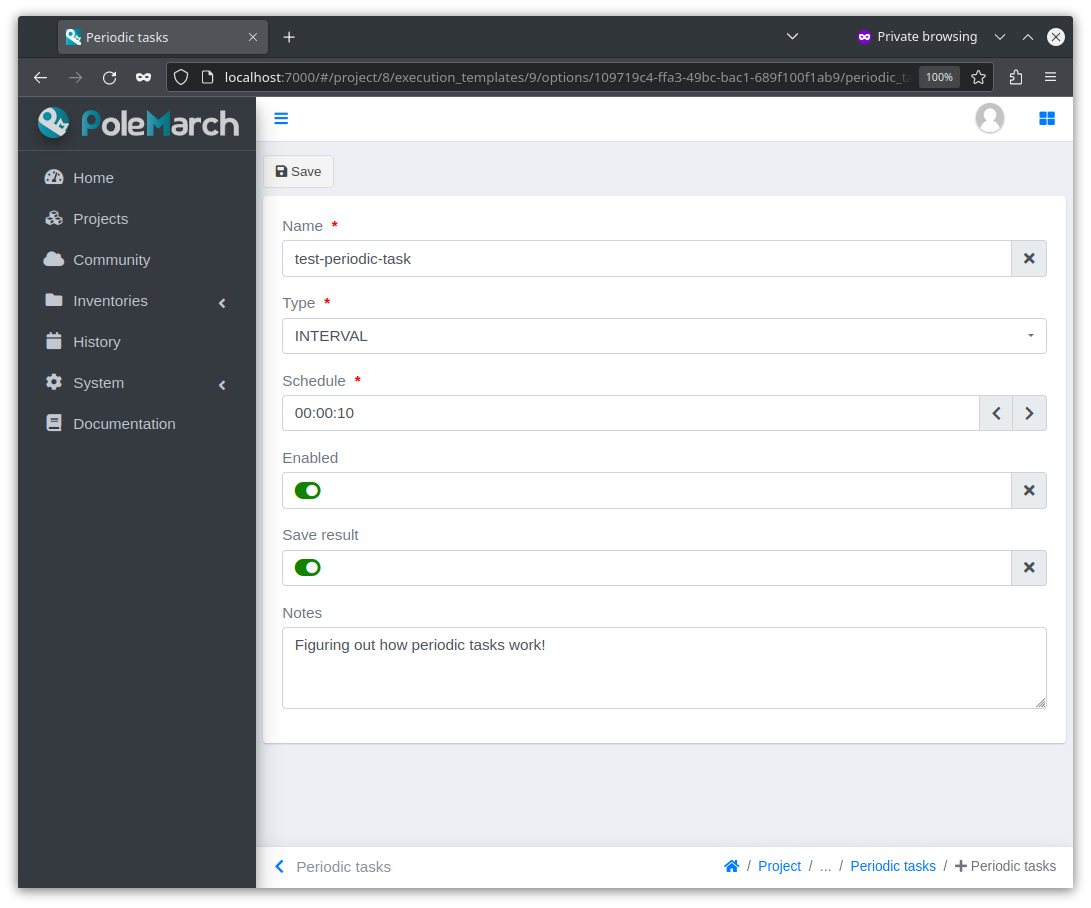
Let’s save the task.
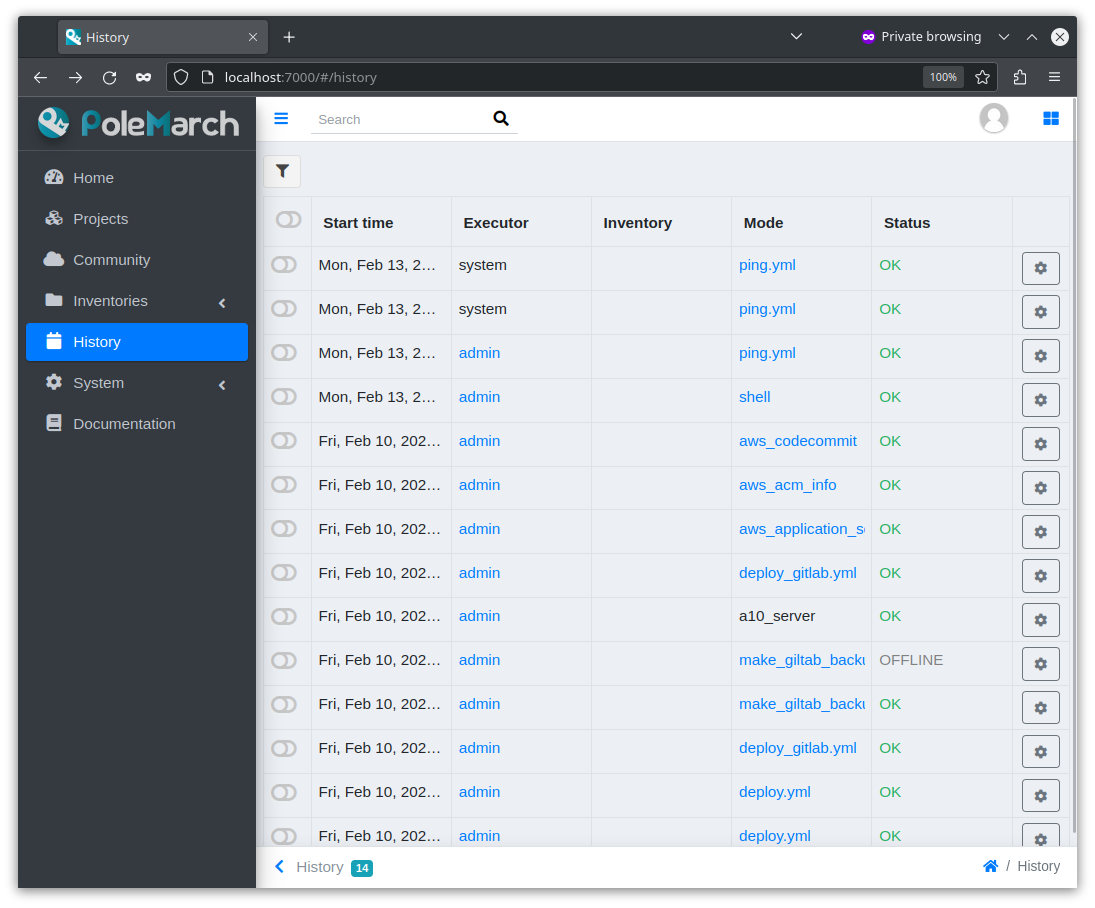
Now you can check history list page. Every 10 seconds an execution history will be generated here. Periodic tasks differ from other tasks by “system” executor:
Inventory
If you don’t want to use ‘inventory’ as just list of hosts separated by ,
or do not have inventory file in you GIT project (“./inventory”, for example),
you need to create it in Polemarch.
Warning
Do not forget to add you inventory to project after it’s creation. To do it click the Inventory button on project page.
Since v3.0.0 inventories can be state managed or not depending on plugin which is manages inventory. We will check them both with an example of built-in ANSIBLE_STRING and ANSIBLE_FILE inventories which are uses state, and POLEMARCH_DB inventory which is not.
Note
You can create your own inventory plugin which will manage its state as you define. If you’re interested in, checkout Inventory plugins documentation.
POLEMARCH_DB inventory
POLEMARCH_DB inventory stores all data in separate entities - groups, hosts and variables and not uses state.
By inventory’s creation in this case, we mean creation of inventory that includes at least one group, which, in turn, includes at least one host. In other words, in addition to the inventory, the user must create a host and a group.
To better understand this, let’s look at next images, which will explain you how to create inventory.
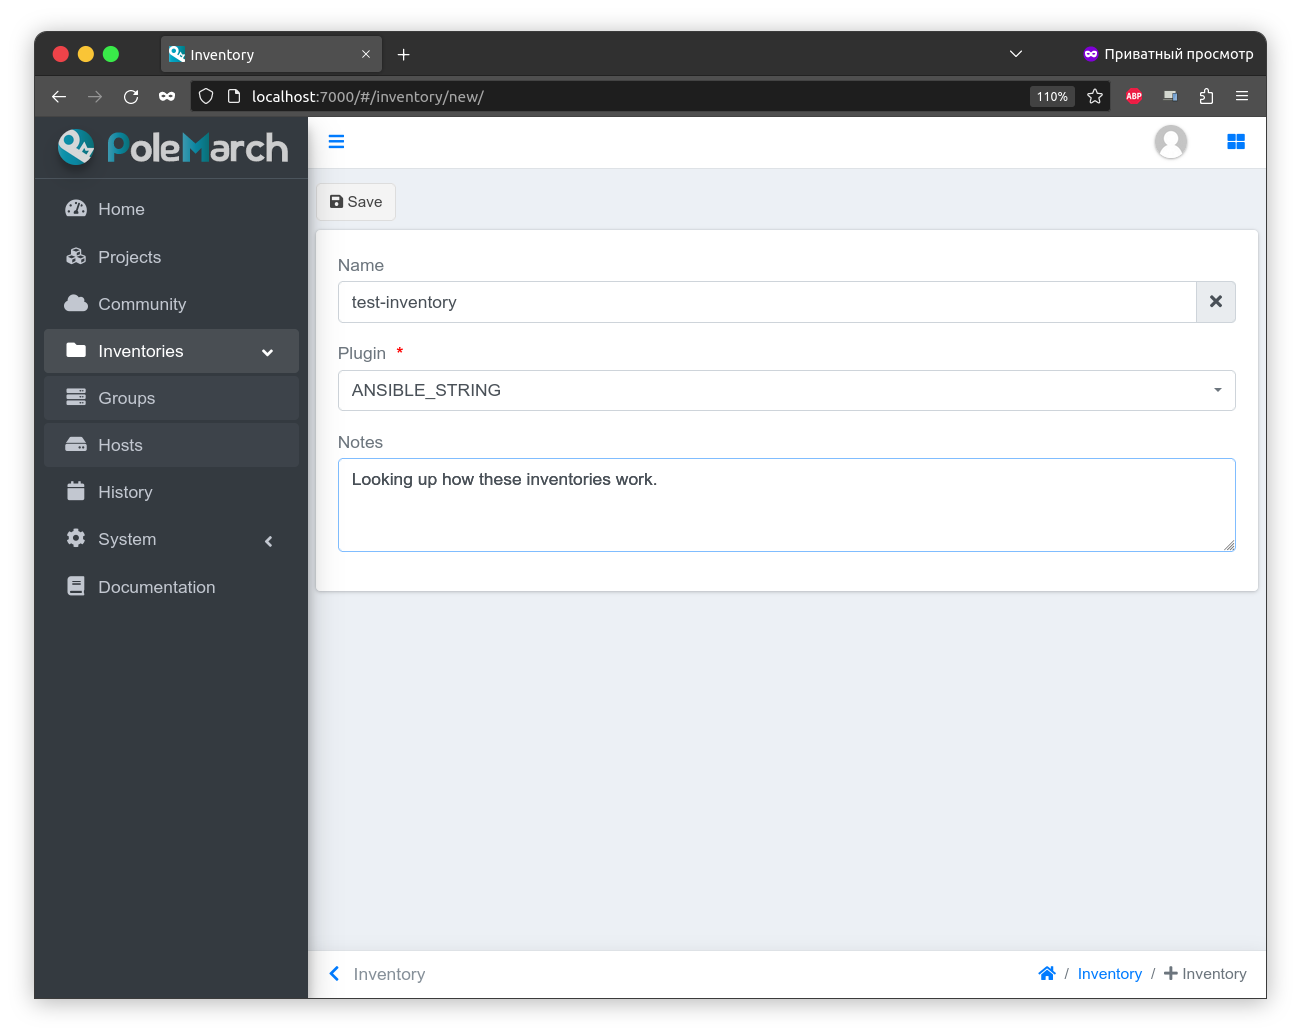
To create inventory you should choose ‘Inventories’ in left side menu and click the Create button. Here you can see the inventory creation form.

As you can see, there are only 3 fields on this page:
Name - name of inventory.
Plugin - plugin which will manage our inventory. We will select POLEMARCH_DB plugin here.
Notes - not required field for some user’s notes, for example, for what purpose this inventory was created or something like this.
And there is only one button here:
Save - this button saves new inventory.
After inventory creation you will see the next page:
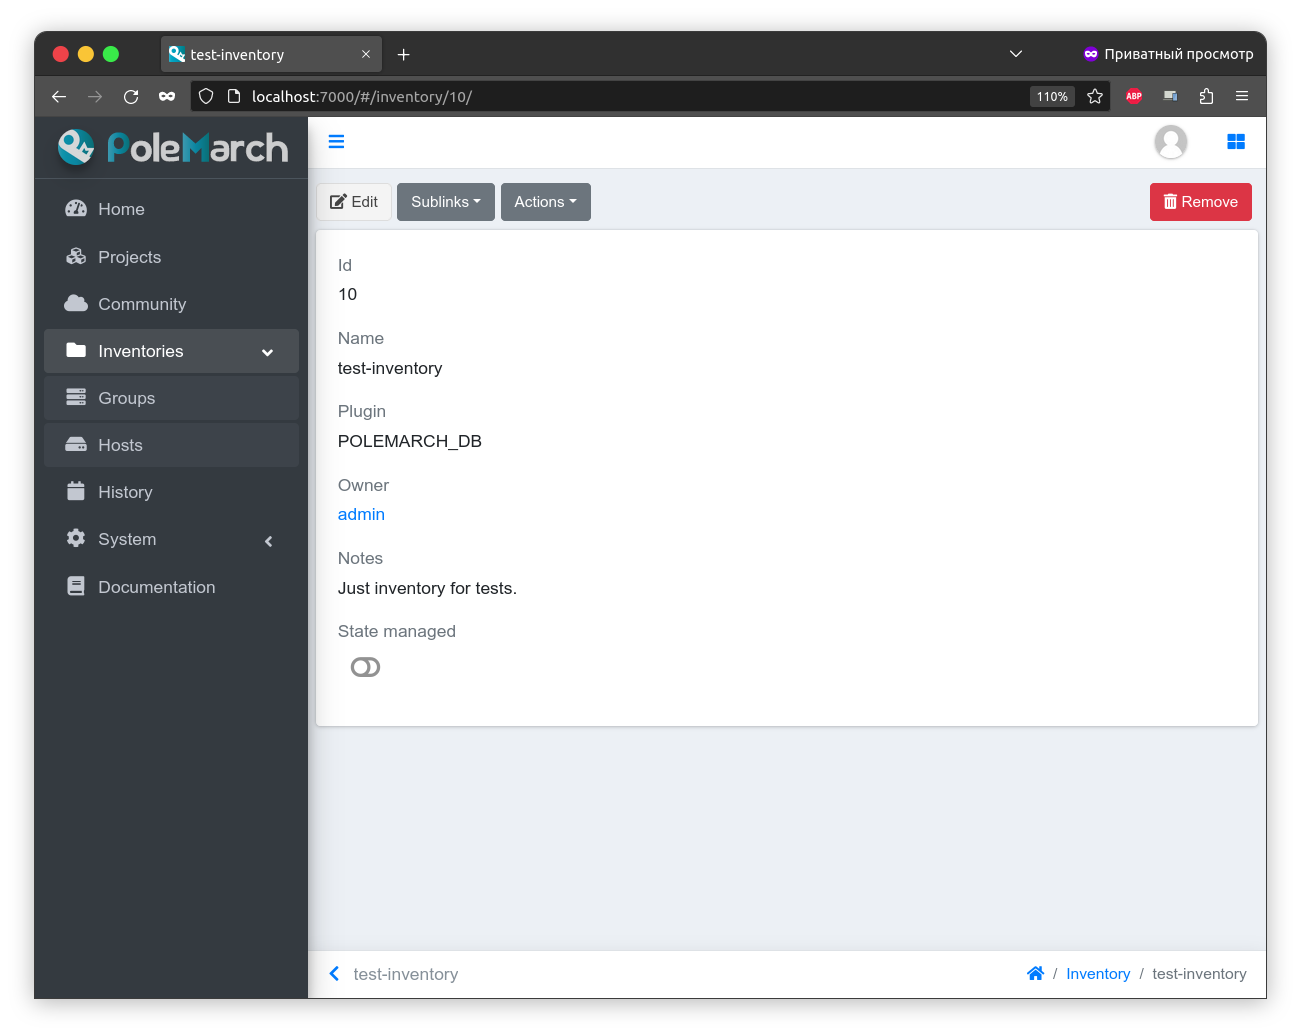
As you can see there are two new fields on this page:
Id - the unique key of object in database.
Owner - user, who owns this inventory.
Also there are some new buttons here:
Edit - this button turns on edit mod for this page.
Remove - this button deletes inventory.
Sublinks buttons:
All groups - this button opens inventory’s all groups list (list of groups, which includes also groups that are nested into inventory groups).
All hosts - this button opens inventory’s all hosts list. (list of hosts, which includes also hosts that are nested into inventory groups).
Group - this button opens inventory’s group list.
Host - this button opens inventory’s host list.
Variables - this button opens inventory’s variables list.
Action buttons:
Copy - this button opens “copy” action page.
Set owner - this button opens “set owner” action page.
Let’s look how you can create a group for this inventory. To do it click the Group button.
Group
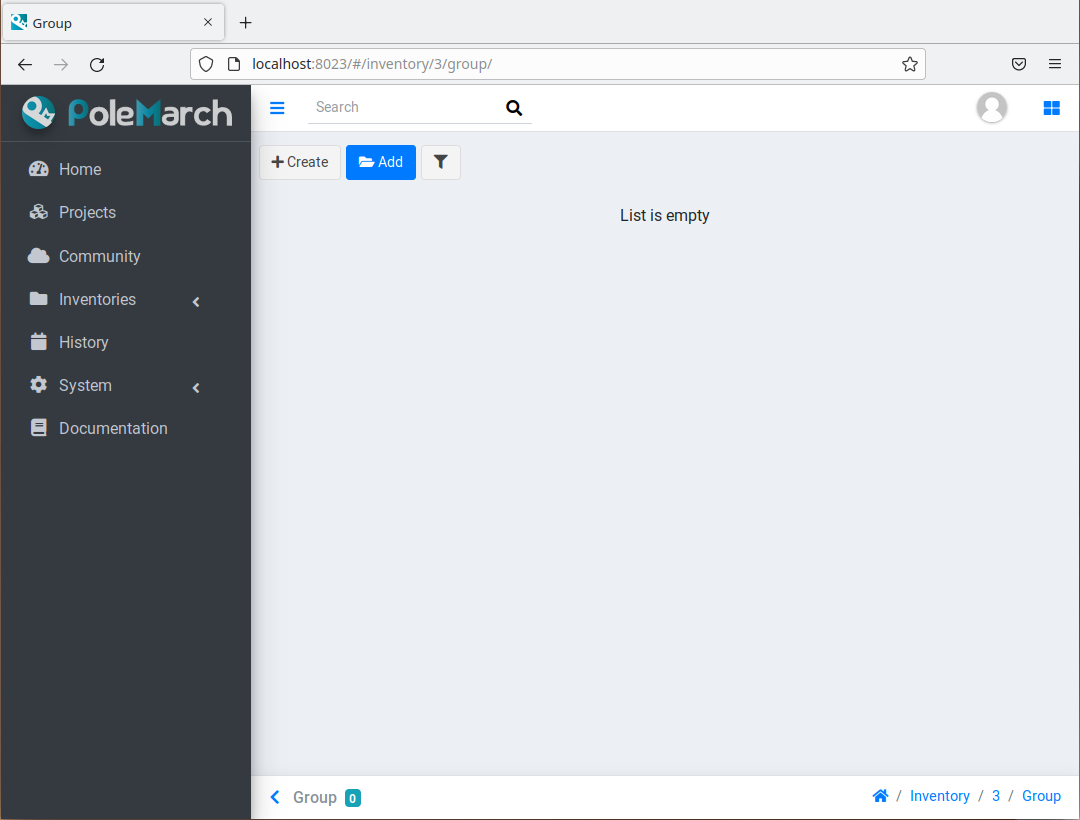
As you can see, there are no groups in the inventory’s group list now.
There are two buttons here:
Create - this button opens the page for creation of new group.
Add - this button opens the all group list from database, from which you can choose group for this inventory.
We need to create a group. To do it click the Create button.

As you can see, the form of new group creation consists of following fields:
Name - name of your group.
Contains groups - boolean field, it means ability of group to contain child groups.
Notes - not required field for some user’s notes, for example, for what purpose this group was created or something like this.
Warning
By default SQLite’s maximum expression tree depth is 1000. This could create problems with very nested groups. If you encounter so, please refer to documentation.
After group creation you will see the next page:
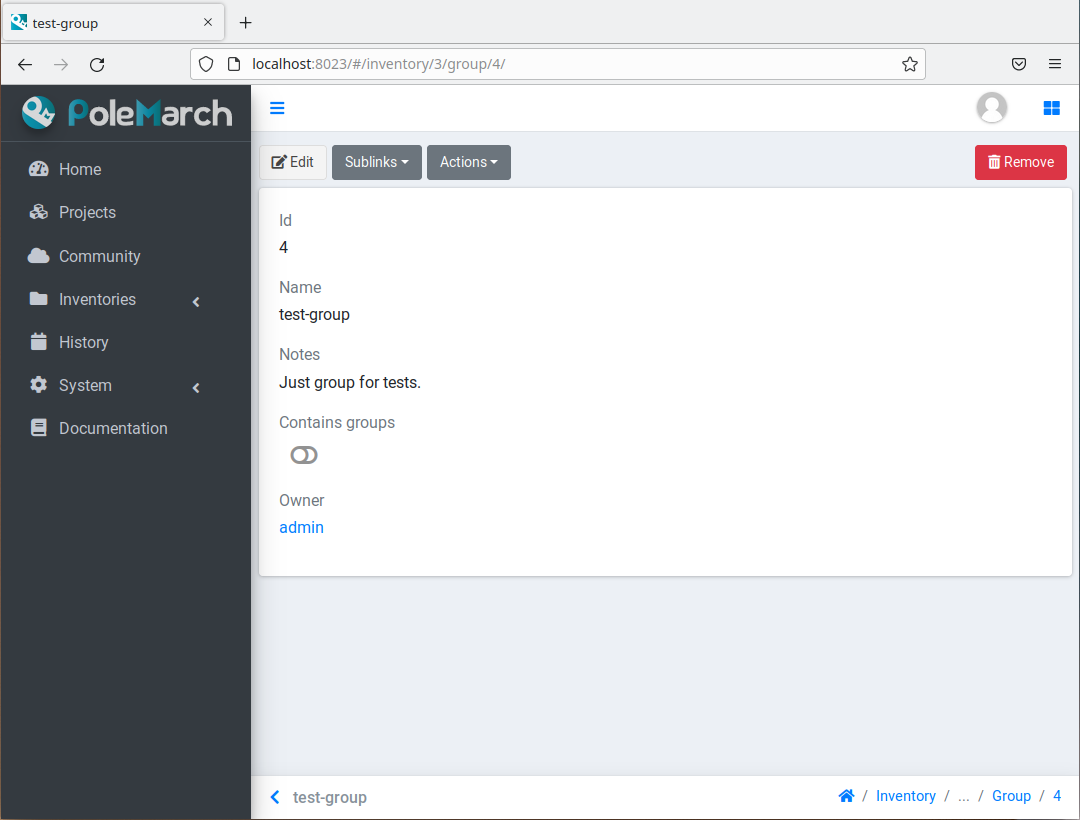
As you can see there are two new fields on this page:
Id - the unique key of object in database.
Owner - user, who owns this group.
Also there are some buttons here:
Edit - this button turns on edit mod for this page.
Remove - this button deletes group.
Sublinks buttons:
Hosts - this button opens group’s host list.
Variables - this button opens group’s variables list.
Action buttons:
Copy - this button opens “copy” action page.
Set owner - this button opens “set owner” action page.
Hosts
Let’s look how you can create a host for this group. To do it click the Create button.

As you can see, there are no hosts in the group’s host list now.
There are two buttons here:
Create - this button opens the page for creation of new host.
Add - this button opens the all host list from database, from which you can choose host for this group.
We need to create host. To do it click the Create button.
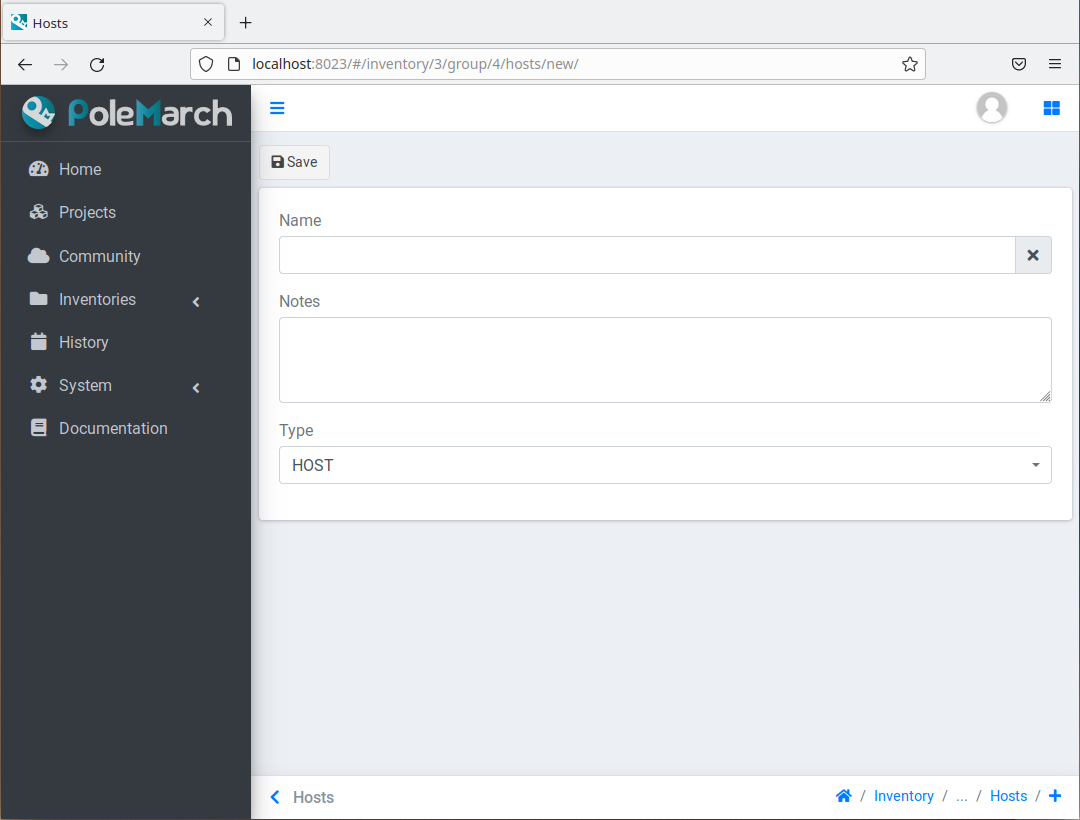
As you can see, the form of new host creation consists of following fields:
Name - name of your host.
Notes - not required field for some user’s notes, for example, for what purpose this host was created or something like this.
Type - type of host (RANGE, HOST).
RANGE - range of IPs or hosts.
HOST - single host.
After host creation you will see the next page:
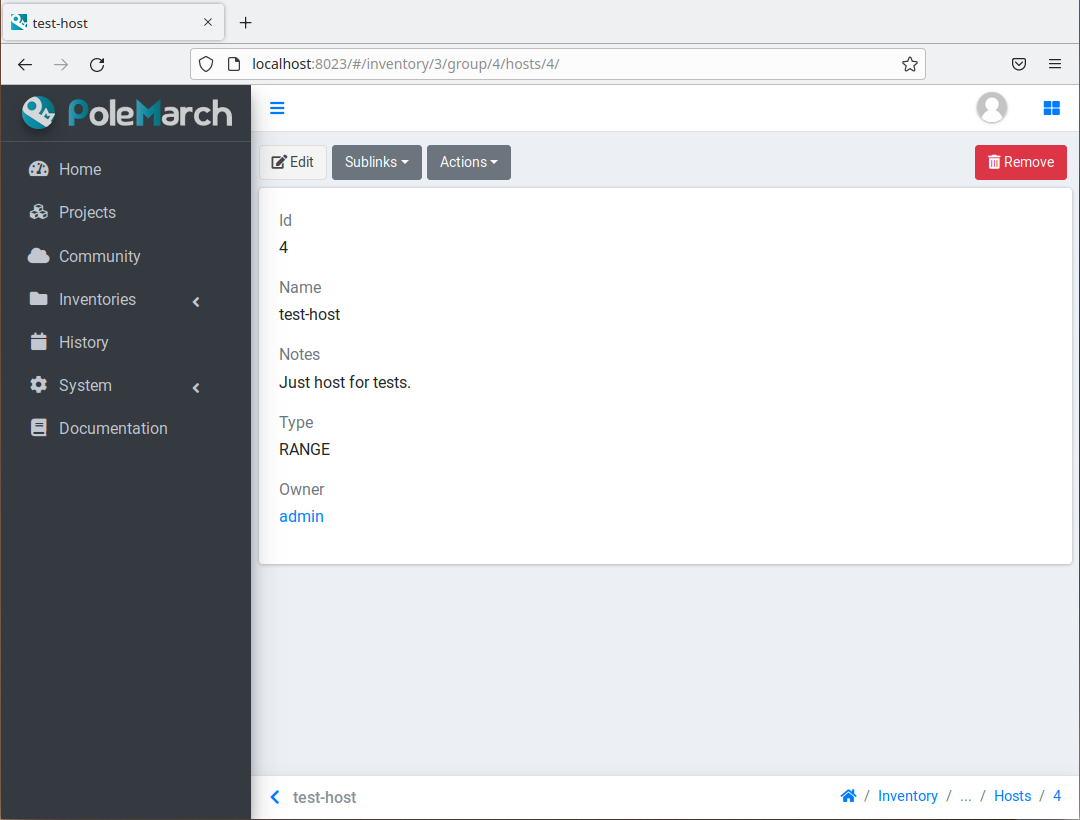
As you can see there are two new fields on this page:
Id - the unique key of object in database
Owner - user, who owns this host.
Also there are some buttons here:
Edit - this button turns on edit mod for this page.
Remove - this button deletes host.
Sublinks buttons:
Variables - this button opens host’s variables list.
Action buttons:
Copy - this button opens “copy” action page.
Set owner - this button opens “set owner” action page.
Let’s look how you can create a variables for host, group and inventory.
Variables for inventory, group, hosts
The process of variable creation for inventory is the same as for group or host. So, let’s look it at the example of variable creation for host.
To do it click the Variables button on the host page:

As you can see, there are no variables in the host’s variables list now.
There is only one button here:
Create - this button opens the page for creation of new variable.
To create variable click the Create button:
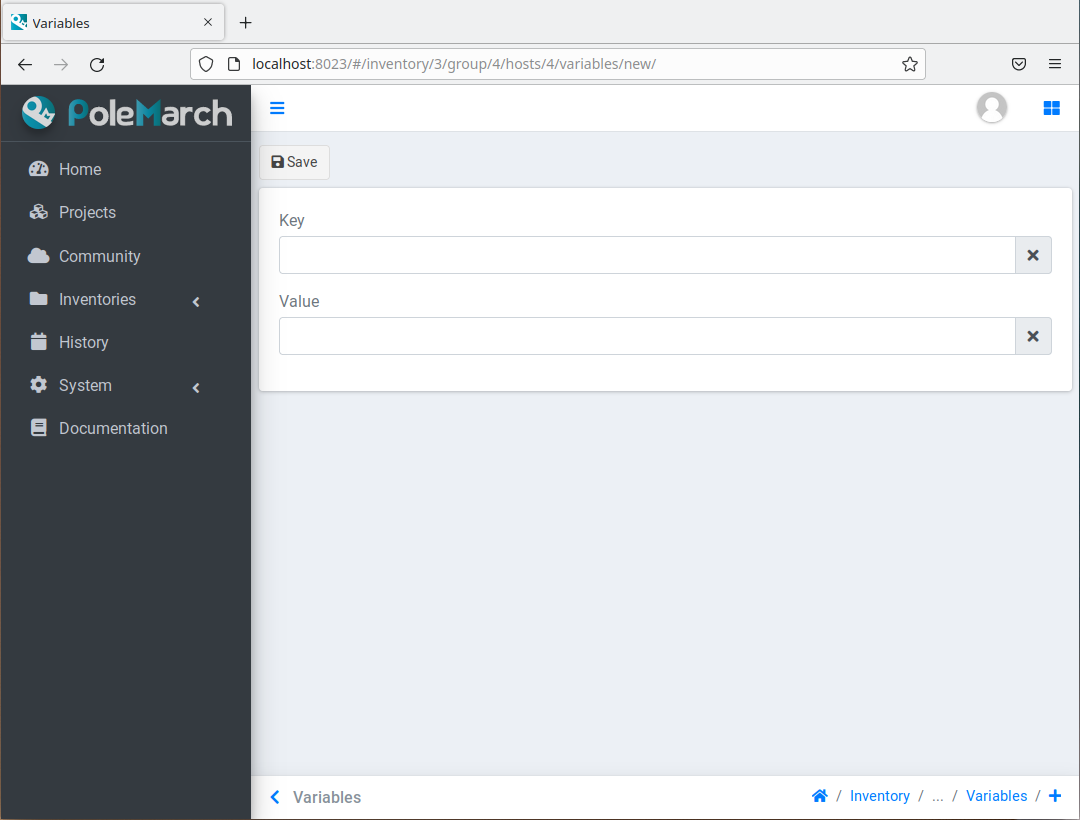
As you can see, the form of new host variable creation consists of following fields:
Key - key of variable.
Value - value of variable.
After variable creation you will see the next page:
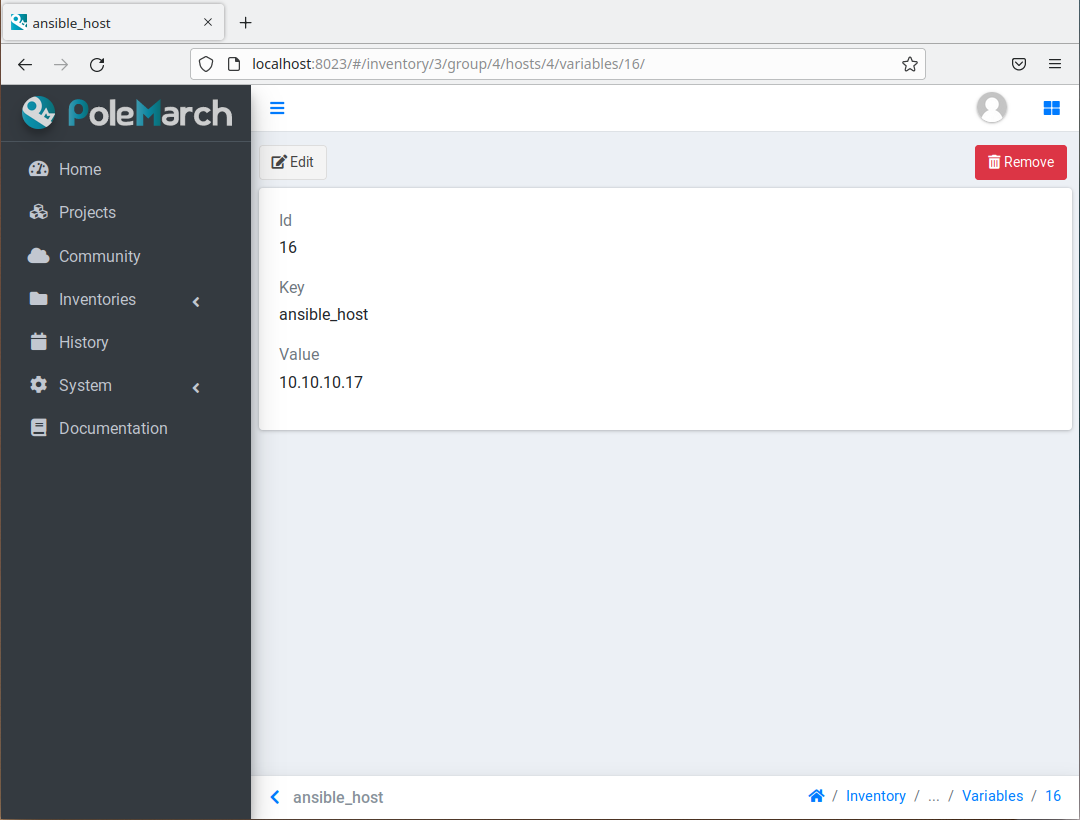
As you can see there is only 1 new field on this page:
Id - the unique key of object in database.
ANSIBLE_STRING inventory
Let’s return to inventory list page and create a new inventory:
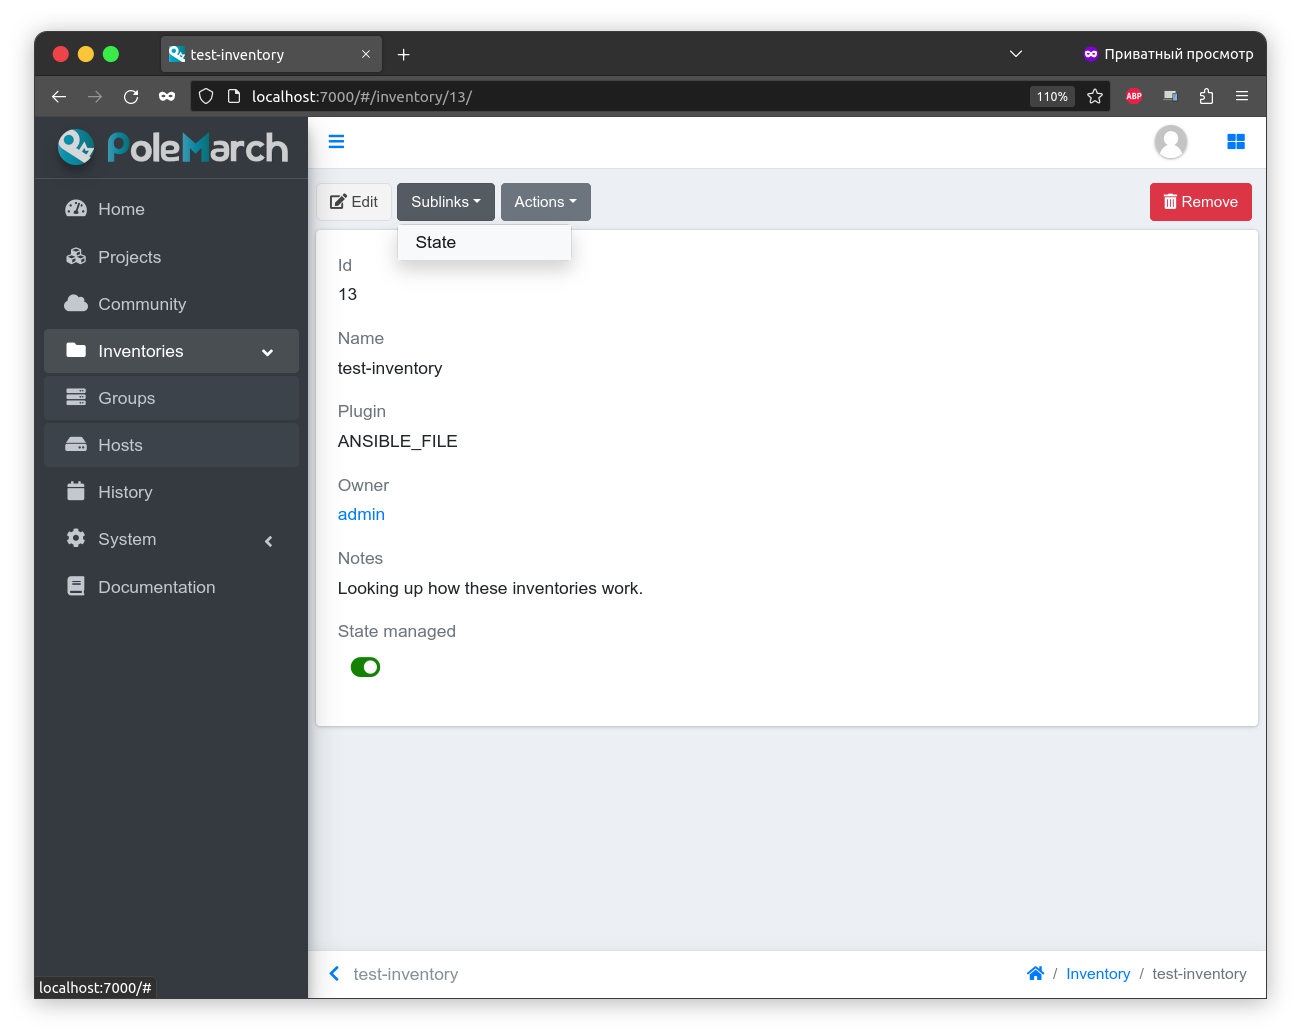
Our created inventory looks like this:

As you can see, compared to POLEMARCH_DB inventory, this one is state managed. Its sublinks will have the only state link. Let’s click it and check the state page:
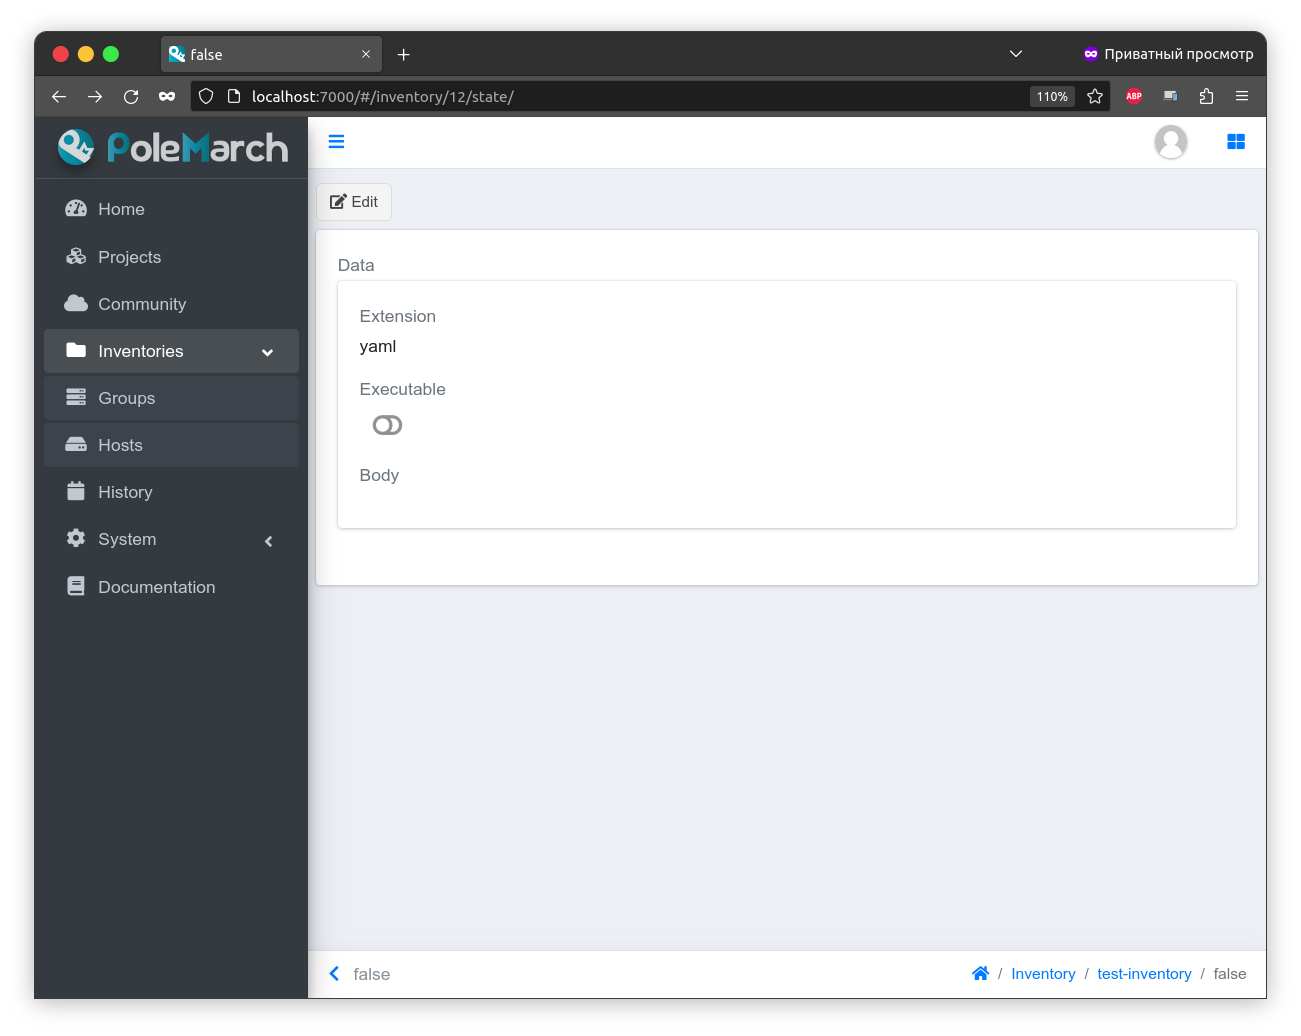
These types of inventory stores an extension of file, its body, filename and specifies either file should be executable or not. Let’s edit the state. Click Edit button:
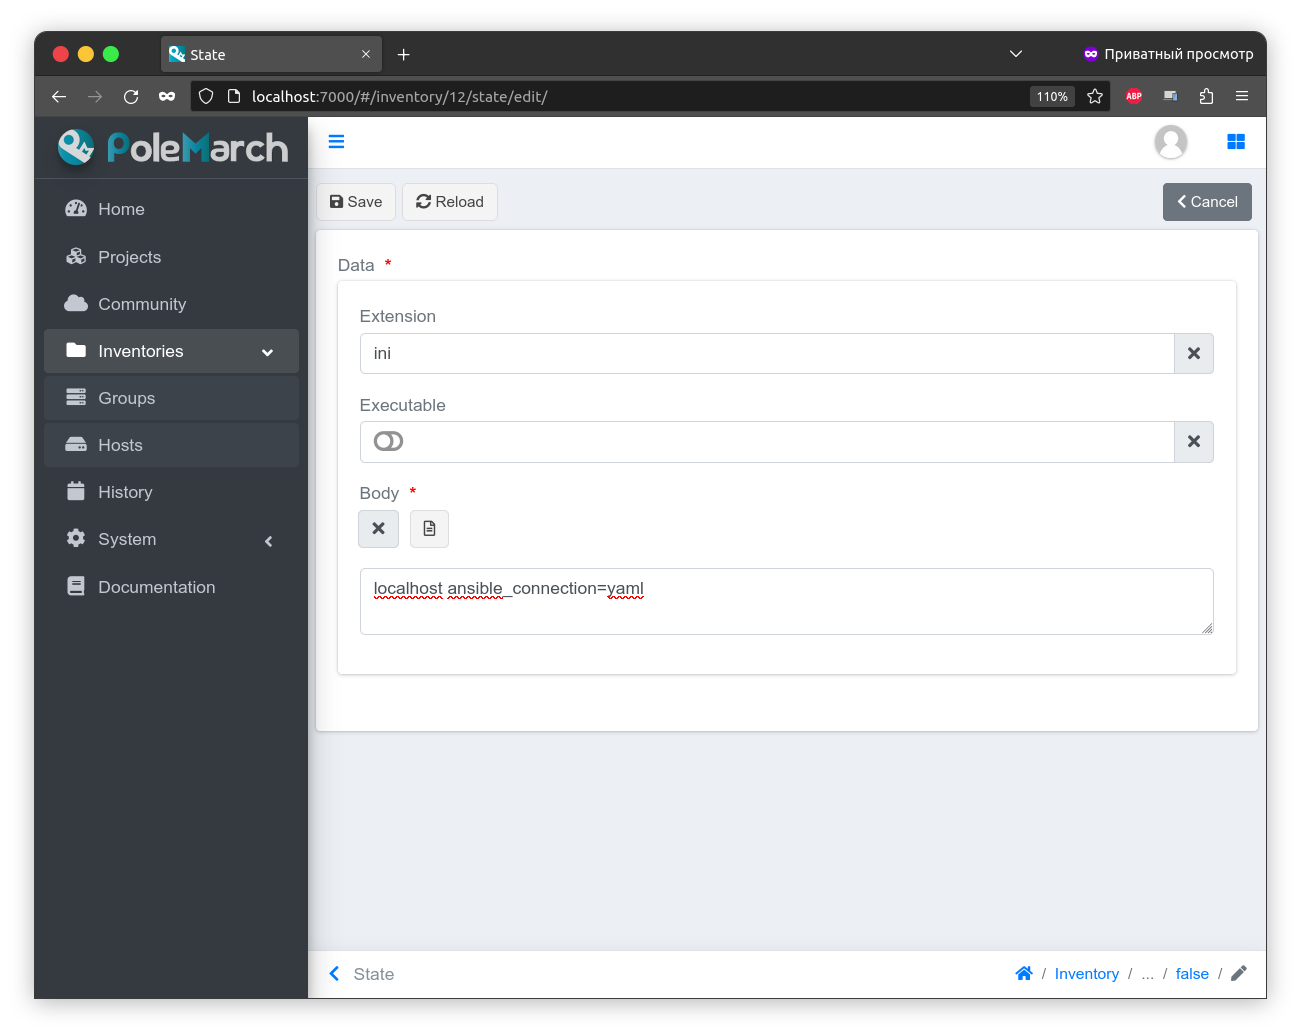
After saving:
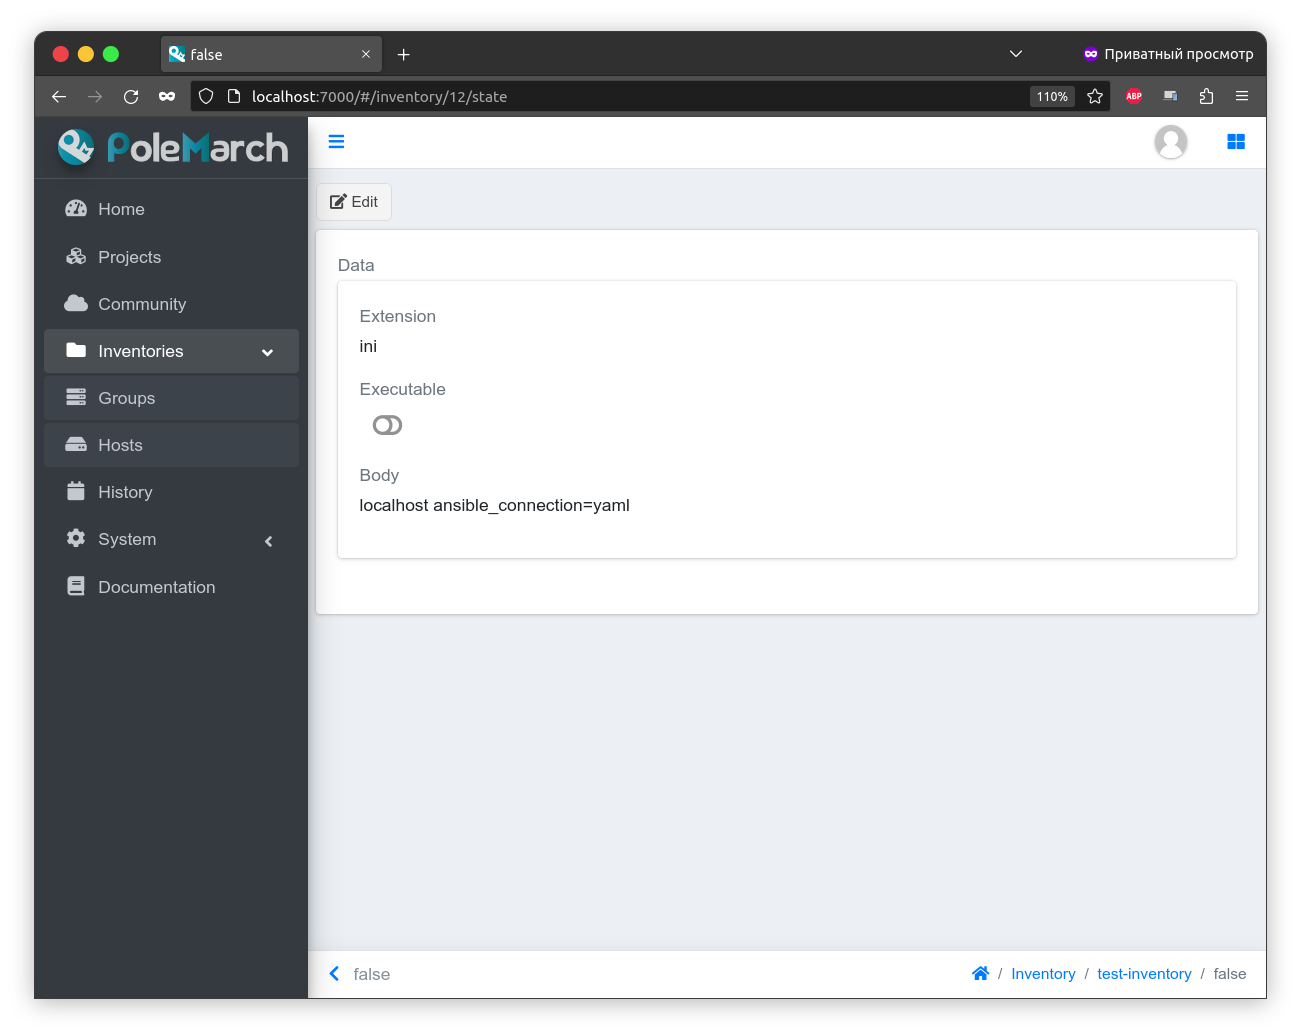
Now inventory is ready for using.
This type of inventory is used to store the completed file in the project directory at the time the task is run. It is helpful when you need to use one of the dynamic ansible inventory plugins.
ANSIBLE_FILE inventory
Again, returning to inventory list page, let’s create and inventory with ANSIBLE_FILE plugin:

These inventories are also stores data in state as State managed hints us:
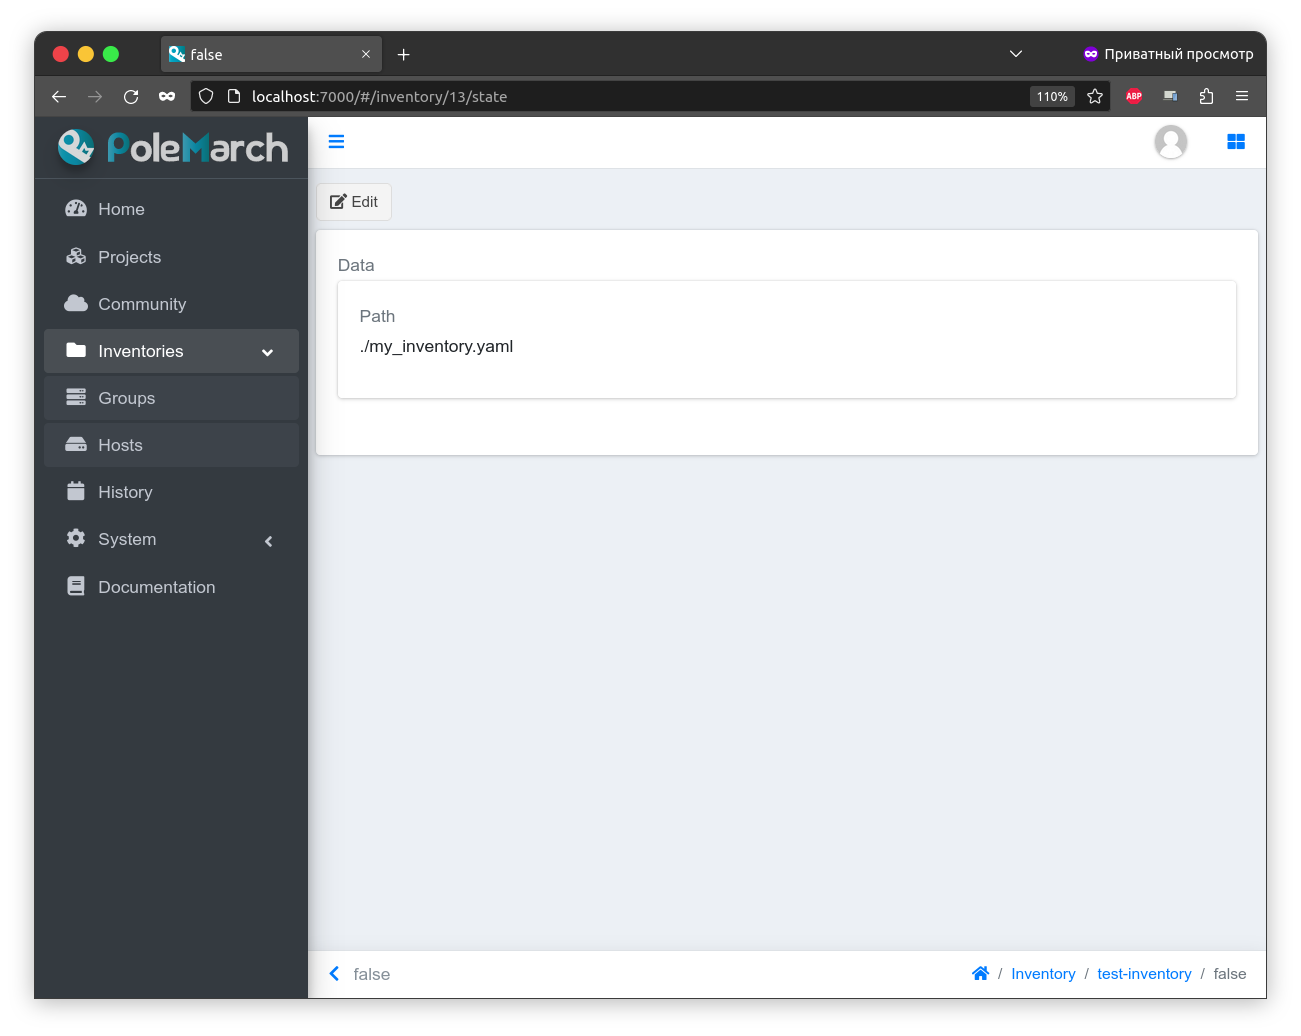
Let’s edit the state (click Sublinks, then State and then Edit):

Here we specify the relative path of inventory file which should be inside the directory with project that will be executed.
Done. Inventory is ready for use.
This type of inventory is used to use file from the project directory at the time the task is run. It is helpful when you have GitOps infrastructure where project files is single store of truth.
Note
The use of strings when specifying an inventory path to describe a launch will be deprecated in future releases and removed from the interface. This inventory type is a direct string replacement.
Import inventory
If you have an inventory file and you want to add items from it to Polemarch, you can do it quickly using “Import Inventory”.
Note
Import action may be available or not depending on which plugin inventory uses. For example, built-in POLEMARCH_DB, ANSIBLE_STRING supports import but ANSIBLE_FILE is not.
Here we will look at import with an example of POLEMARCH_DB inventory. Import with ANSIBLE_STRING inventories works similar except that imported data saves to inventory state.
For example, let’s use next inventory file:
[imported-test-group]
imported-test-host ansible_host=10.10.10.17

[imported-test-group:vars]
ansible_user=ubuntu
ansible_ssh_private_key_file=example_key
To import inventory you should open inventory list page:
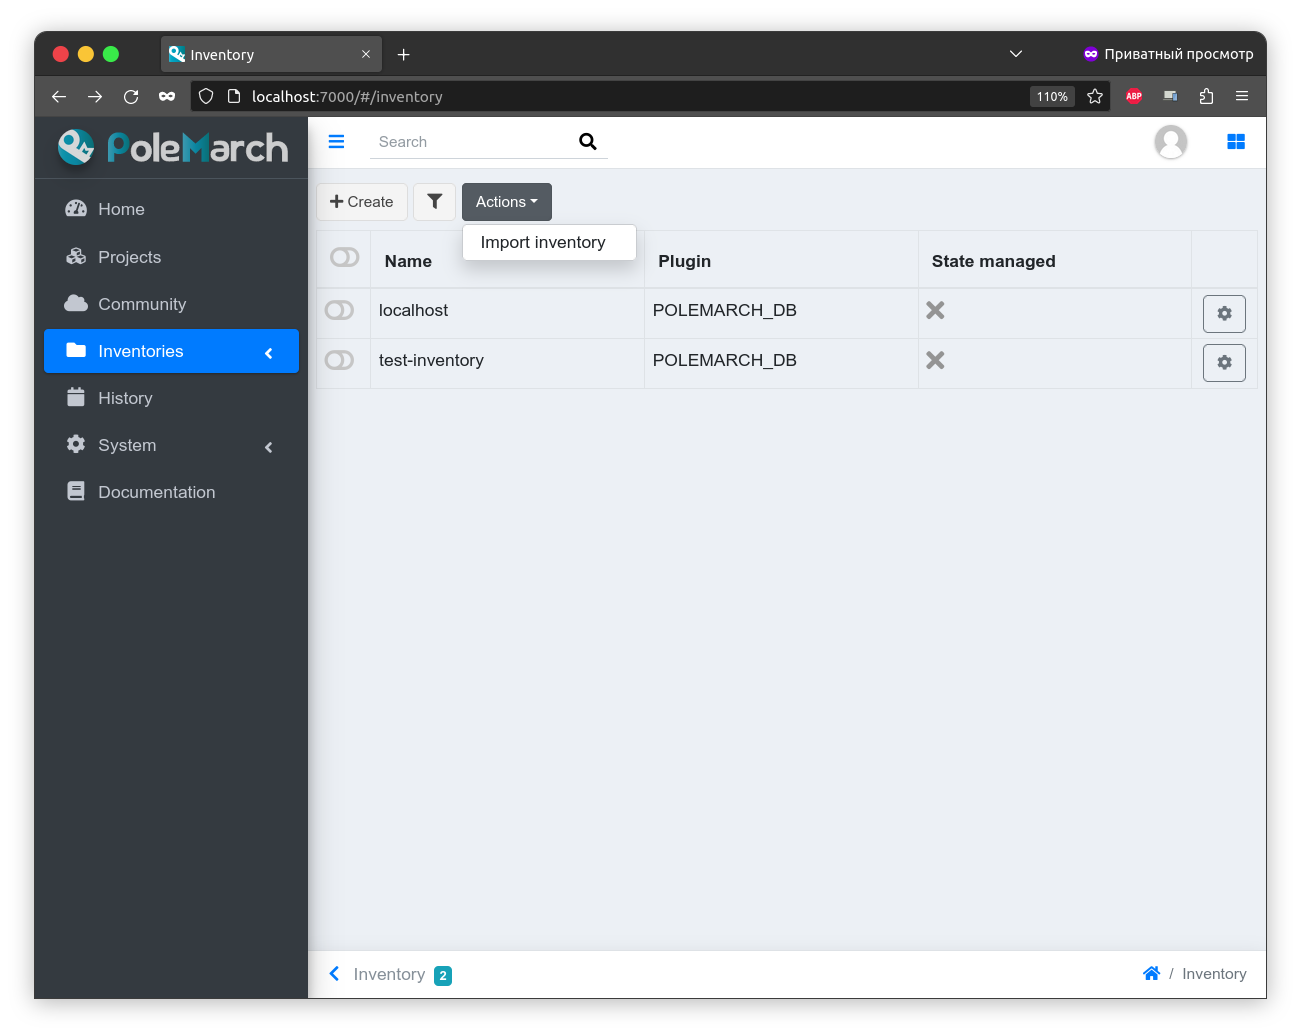
And click the Import inventory button. Then you will see the next page:
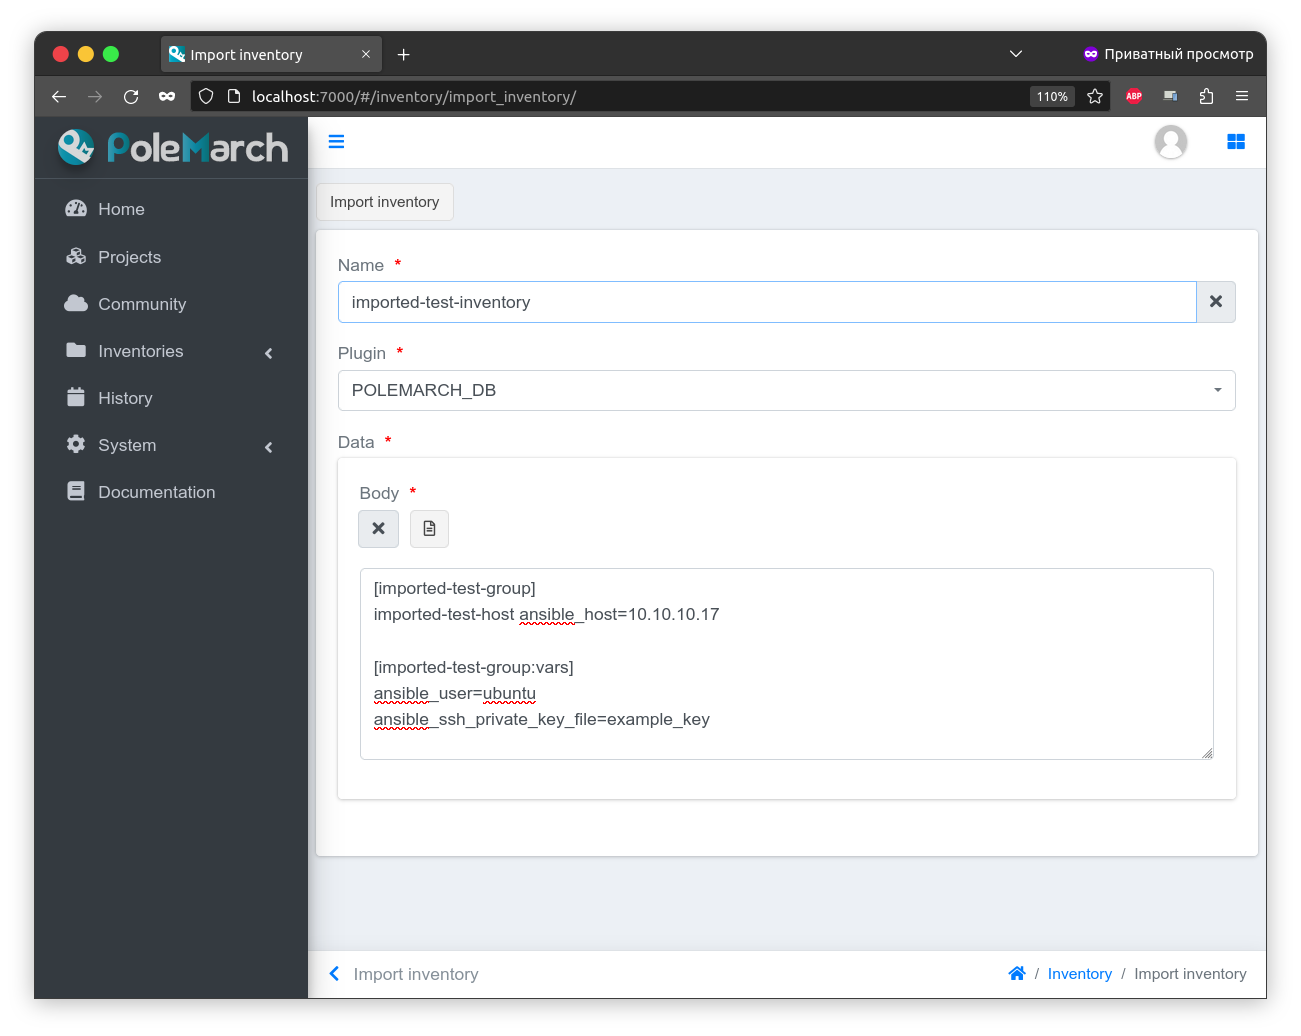
As you can see, the form of “Import inventory” action consists of two fields:
Name - name of your inventory.
Row data - content of your inventory file.
After filling of all fields you should click the Import inventory button and then you will see page of your imported inventory:
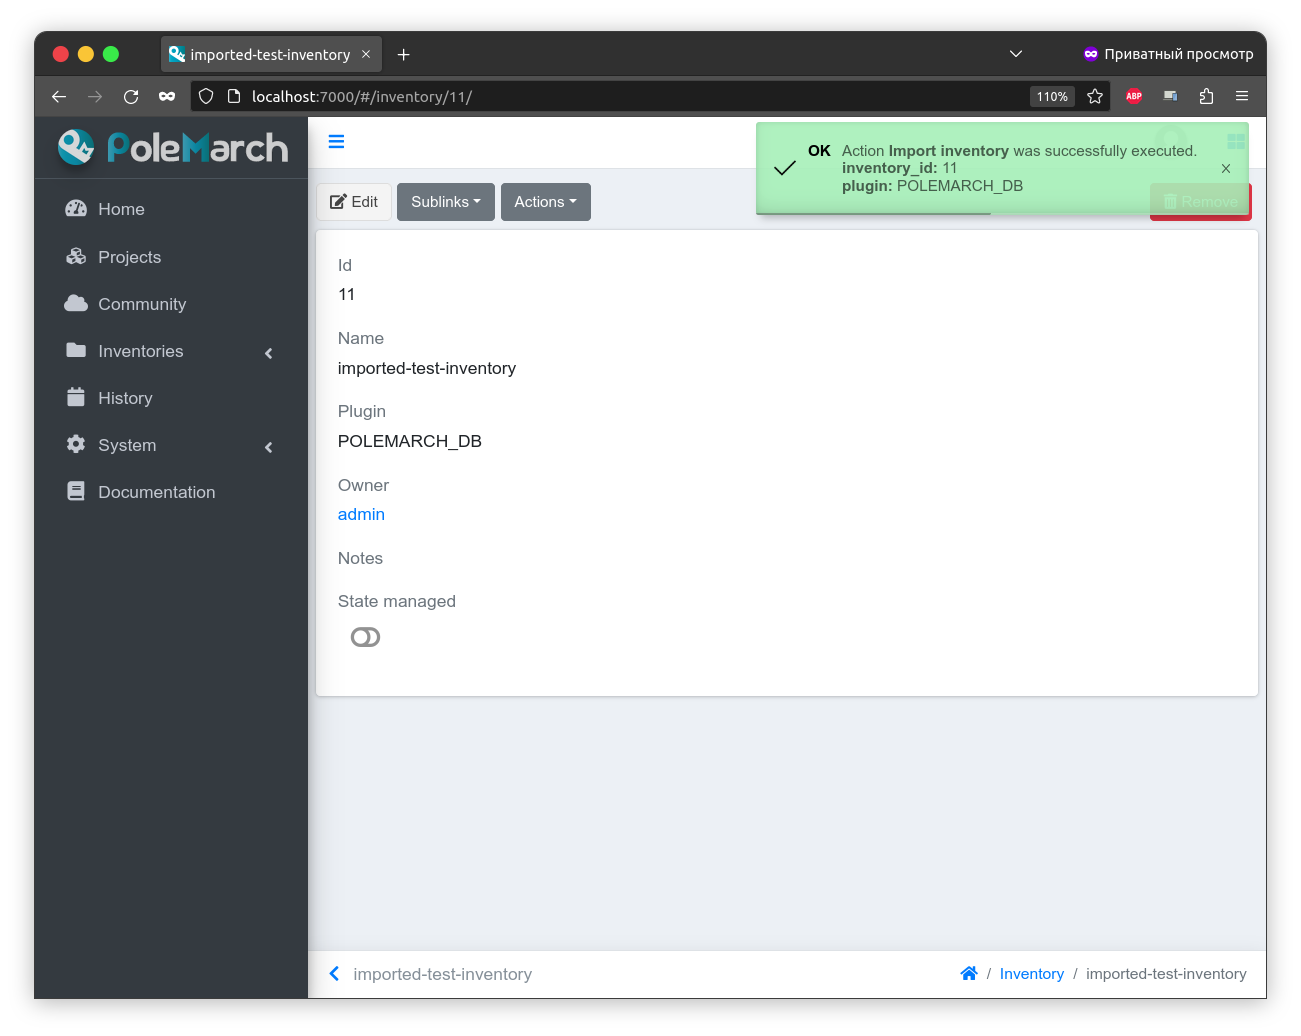
This inventory includes “imported-test-group” from imported inventory file:

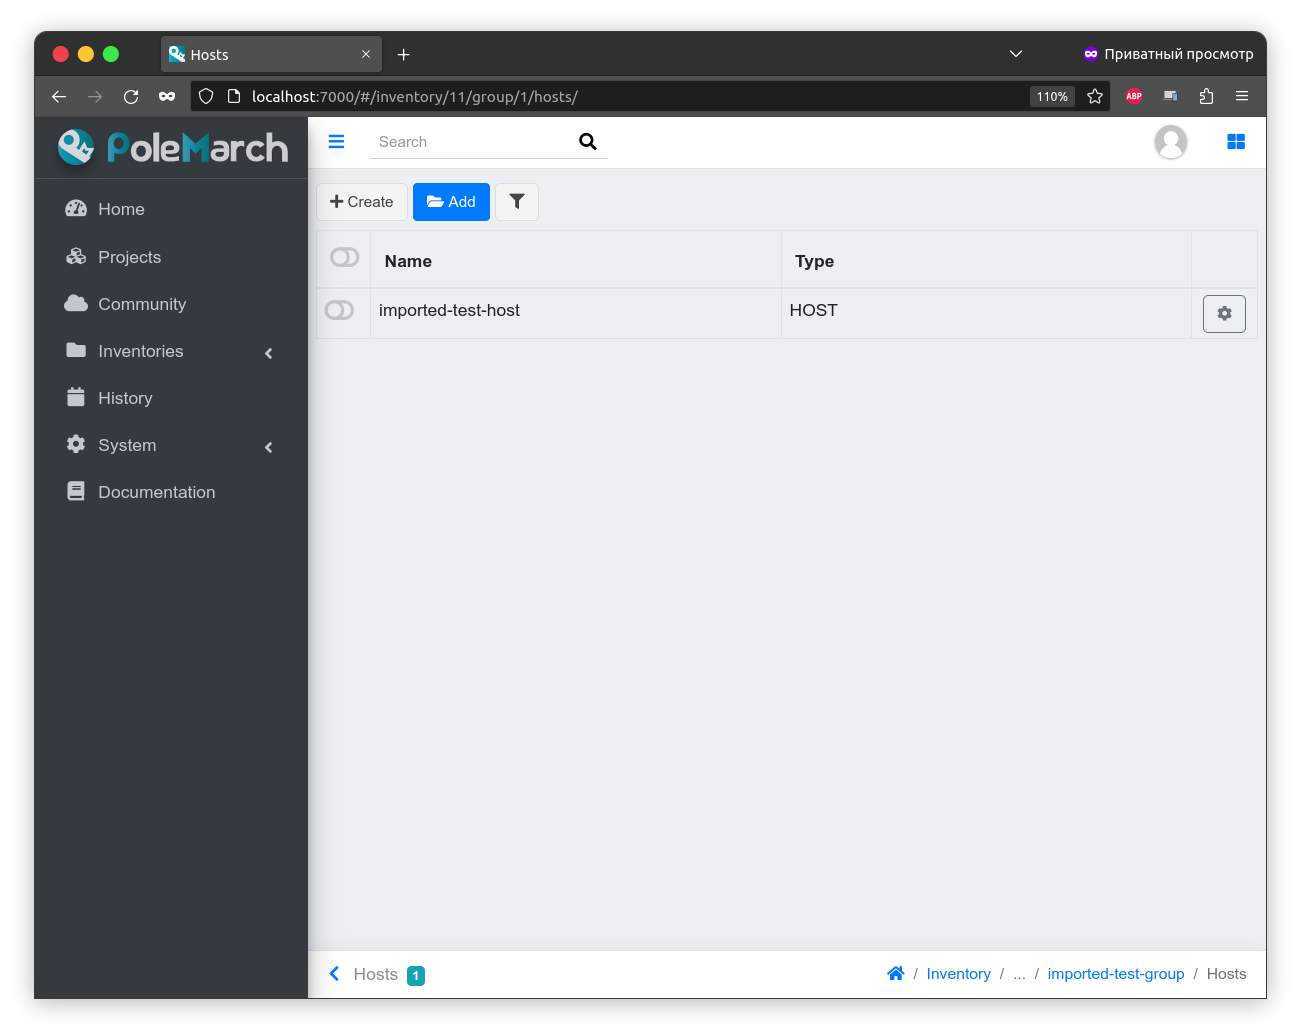
And “imported-test-group” includes “imported-test-host” from imported inventory file:
Also “imported-test-group” includes variables “ansible_user” and “ansible_ssh_private_key_file” from imported inventory file:

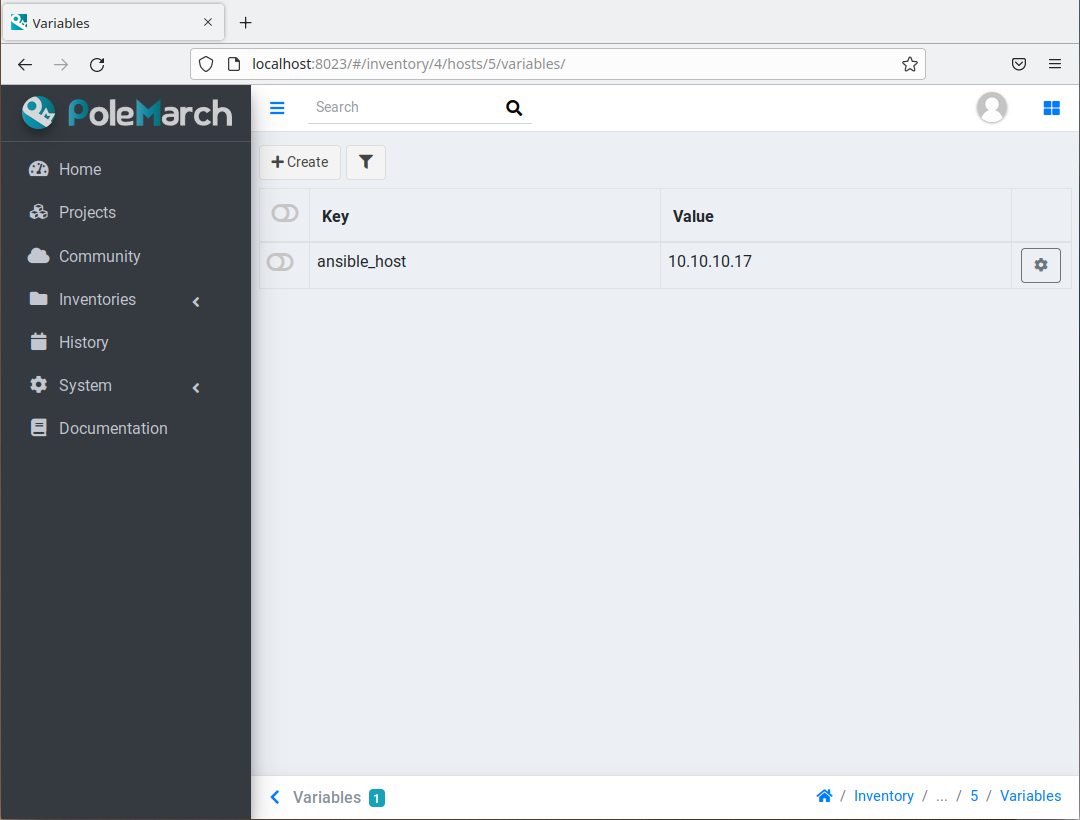
“imported-test-host” includes variable “ansible-host” from imported inventory file:
.polemarch.yaml
.polemarch.yaml is a file for a quick deployment of Polemarch project.
By quick deployment of Polemarch project we mean automatic creation of some templates
for this project (during project sync) and using of additional interface for quick task execution.
.polemarch.yaml is not required file for Polemarch work,
but if you want to use features of .polemarch.yaml, you have to store it in
the base directory of (GIT, MANUAL, TAR) project.
Structure of .polemarch.yaml consists of next fields:
sync_on_run - boolean, it means to get or not to get settings from
.polemarch.yamlduring each project sync.templates - dictionary, consists of template objects (their structure is similar to template’s API structure except the ‘name’ field).
templates_rewrite - boolean, it means to rewrite or not to rewrite templates in project with names equal to templates’ names from
.polemarch.yaml.view - dictionary, it is a description of web-form, that will be generated from
.polemarch.yaml. It consists of:fields - dictionary, it consists of objects, that describe fields properties:
title: title of field, that Polemarch will show in web-form.
default: default value of field. Default:
''- for strings,0- for numbers.format: format of field. For today next field formats are available: string, integer, float, boolean. Default: string.
help: some help text for this field.
playbooks - dictionary, it consists of objects, that describes playbook properties:
title: title of playbook, that Polemarch will use during playbook execution.
help: some help text for this playbook.
Example of .polemarch.yaml:
---
sync_on_run: true
test-module:
    plugin: ANSIBLE_MODULE
    options:
        default:
            module: ping
            group: all
            inventory: localhost,
        uptime:
            module: ping
            args: uptime
            inventory: 127.0.0.1,
test-playbook:
    plugin: ANSIBLE_PLAYBOOK
    options:
        update:
            playbook: main.yml
            become: true
templates_rewrite: true
view:
    fields:
        string:
            title: Field string
            default: 0
            format: string
            help: Some help text
        integer:
            title: Field integer
            default: 0
            format: integer
            help: Some help text
        float:
            title: Field float
            default: 0
            format: float
            help: Some help text
        boolean:
            title: Field boolean
            default: 0
            format: boolean
            help: Some help text
        enum_string:
            title: Field enum_string
            default: 0
            format: string
            help: Some help text
            enum: ['Choice1', 'Choice2', 'Choice3']
        unknown:
            title: Field unknown
            default: 0
            format: invalid_or_unknown
            help: Some help text
    playbooks:
        main.yml:
            title: Execute title
            help: Some help text
Note
Since Polemarch v3.0.0 execution templates system has been changed a lot. Along with it, the format for describing templates has also changed. We still support old format like in the next example:
...
templates:
    test-module:
        notes: Module test template
        kind: Module
        data:
            group: all
            vars: {}
            args: ''
            module: ping
            inventory: localhost,
        options:
            uptime:
                args: uptime
                module: shell
    test playbook:
        notes: Playbook test template
        kind: Task
        data:
            vars: {"become": true}
            playbook: main.yml
            inventory: localhost,
        options:
            update: {"playbook": "other.yml"}
  ...

Here *kind* (Task, Module) is converted to *plugin* (ANSIBLE_PLAYBOOK, ANSIBLE_MODULE)

But keep in mind that this format has been deprecated and it's
desirable to rewrite templates to match the new format.
In GUI process of working with .polemarch.yaml will be the following:
Firstly, you need to create a project with .polemarch.yaml
(or to add .polemarch.yaml to existing project).
For example, let’s create new GIT project, that has in its base directory .polemarch.yaml file
from the example above:
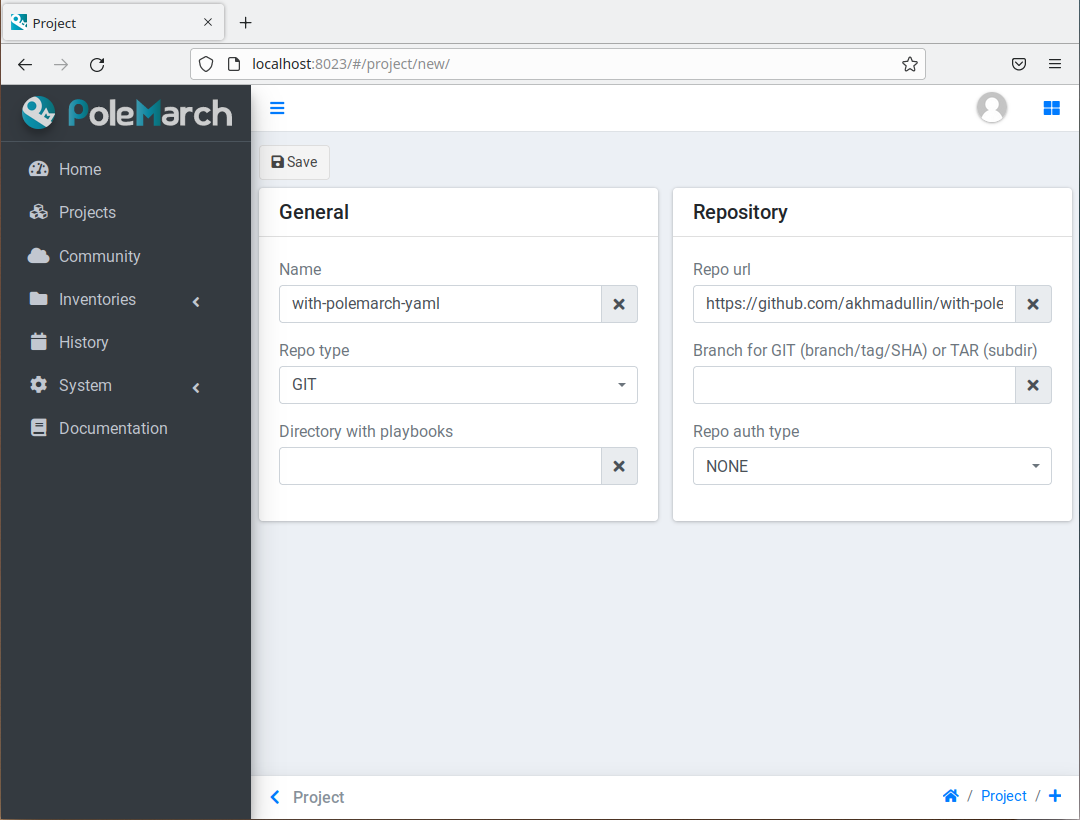
In the field ‘Repo url’ you should insert URL of project that has in its base directory
.polemarch.yaml file.
After project creation you will see the ordinary project page:
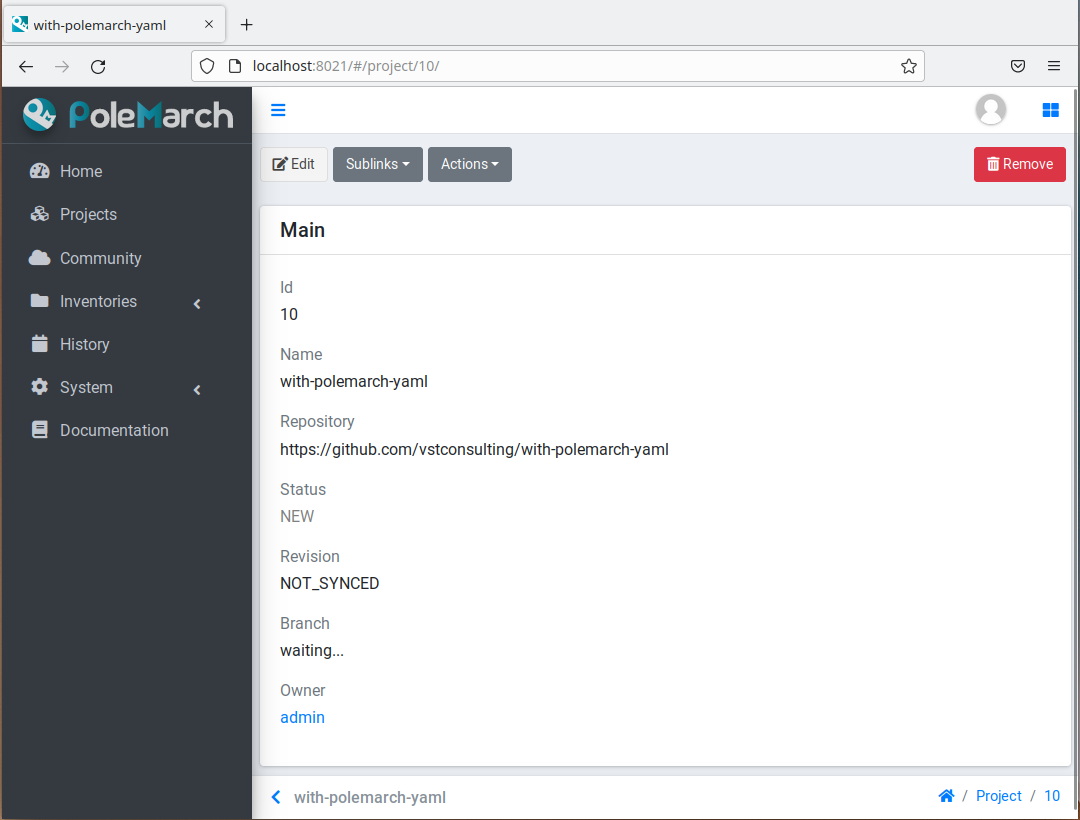
Then you need to click the Sync button. After project synchronization you will see the next page:
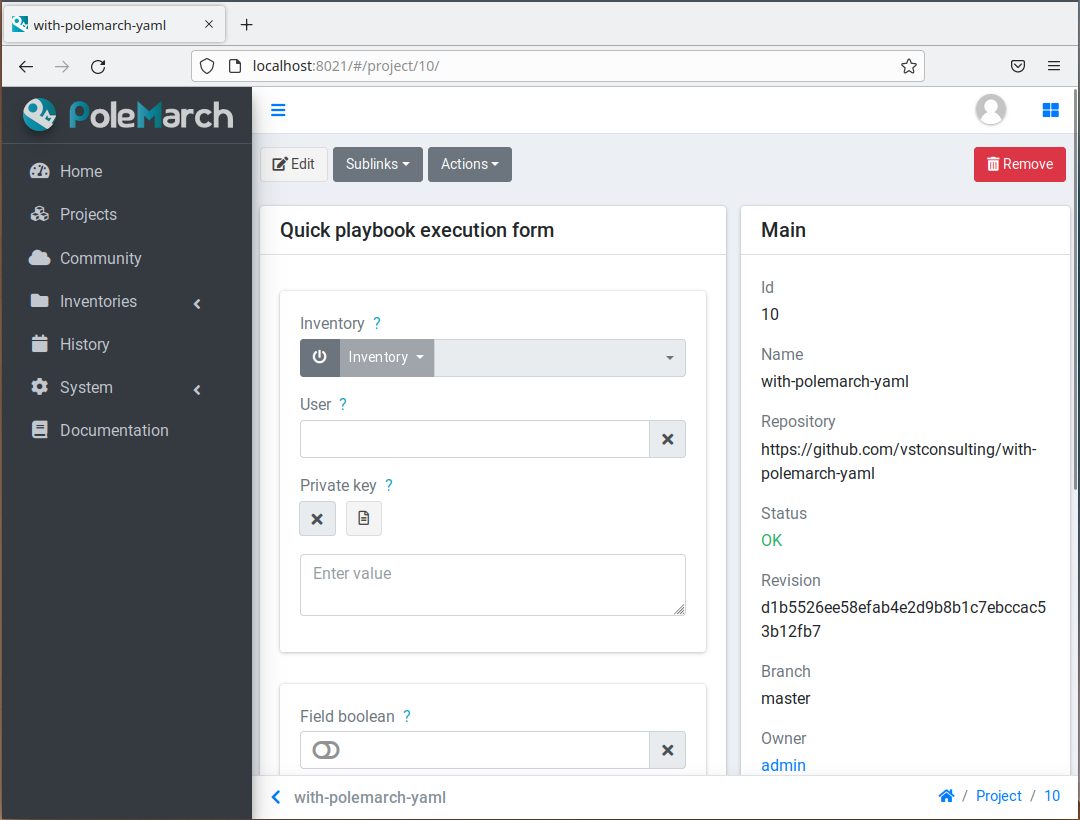
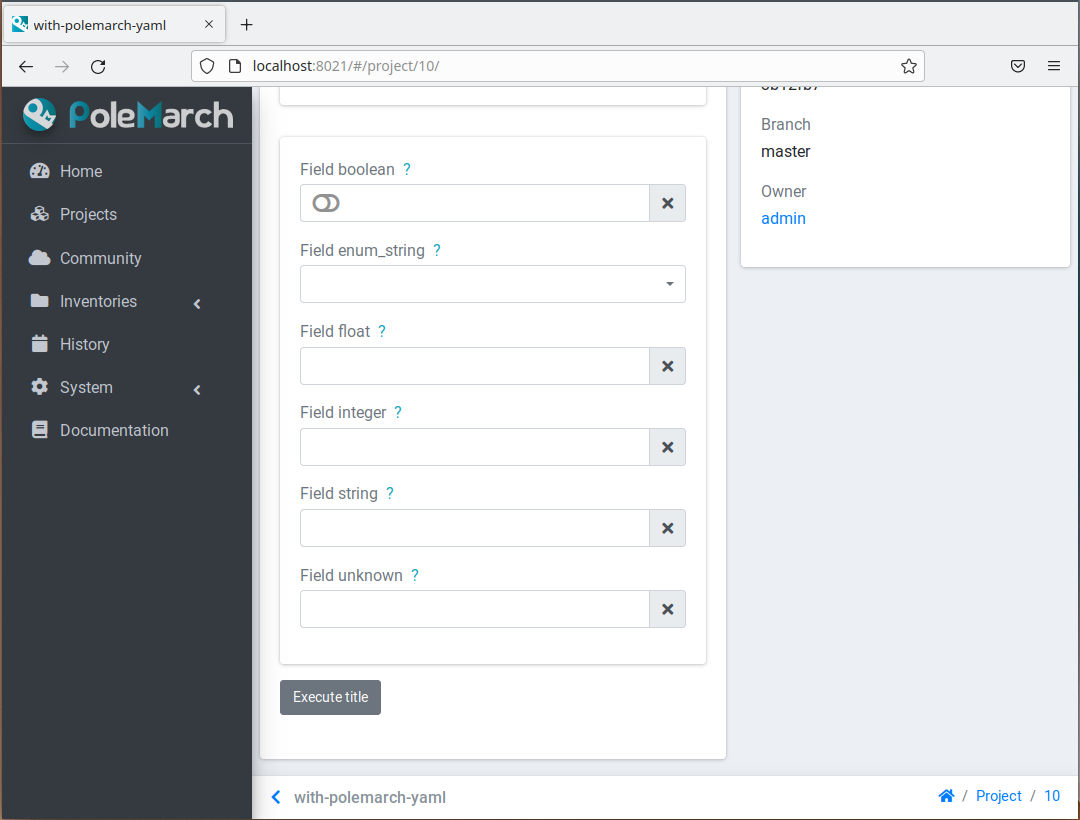
As you can see, all fields that we mentioned in the example .polemarch.yaml were added
to this web-form. Values of all these fields will be used as ansible extra_vars parameter during task execution.
The remaining fields mean following:
Inventory - it can be inventory from Polemarch system, list of hosts, that are separated by
,, or path to your inventory in project folder.User - set it if your don’t have
ansible_uservariable in your inventory.Key file - set it if your don’t have
ansible_ssh_private_key_filevariable in your inventory.
Button Execute title will execute playbook “main.yml”, as we mentioned in .polemarch.yaml file.
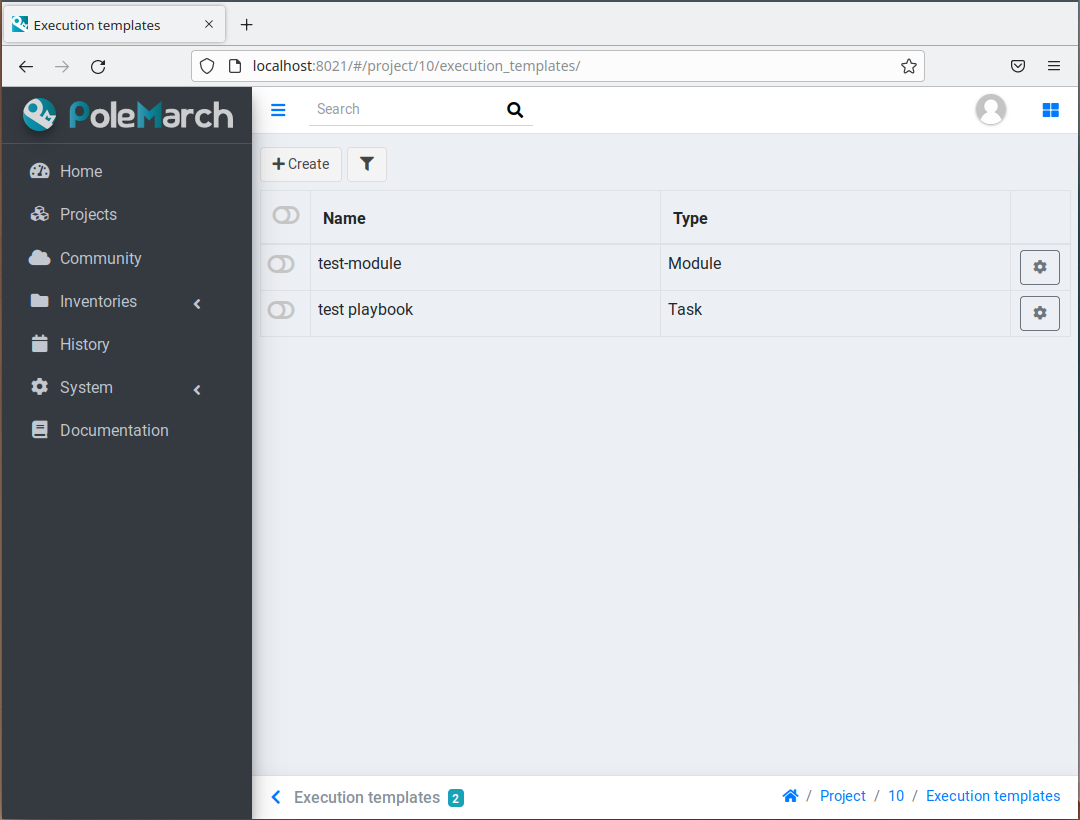
Also templates from .polemarch.yaml were added to just created Polemarch project.
Community project samples
Polemarch has his own list of community repositories, which provide you with stuff,
that is able to deploy different services in extremely quick and convenient way.
Community project sample is an entity, that clones repository from community list into your Polemarch.
Some community project samples have only list of playbooks, but most have .polemarch.yaml file,
that helps you to deploy tasks even faster.
Let’s look how it works on examples.
Firstly, open page with community project samples list.
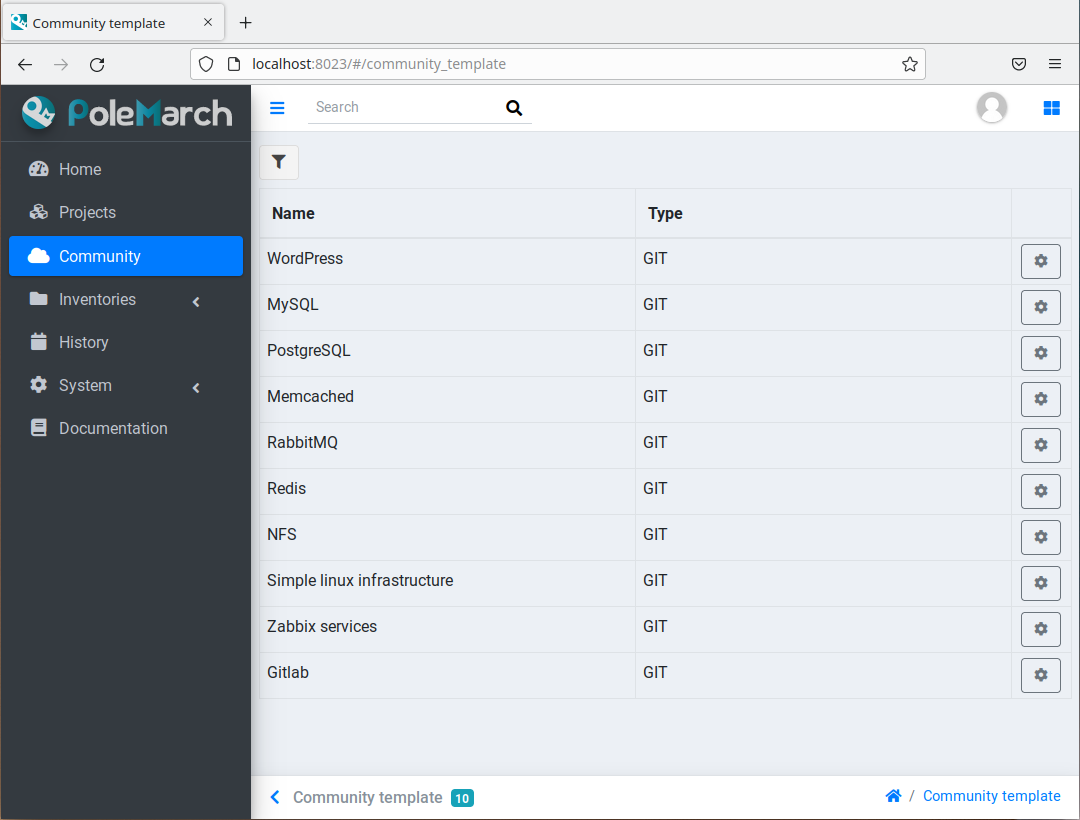
As you can see, there is a table with list of community repositories, that consists of following columns:
Name - name of community repository.
Type - type of community repository.
Let’s open “WordPress” community repository page.

As you can see, the community repository page consists of following fields:
Id - id of community repository;
Name - name of community repository;
Description - description of community repository;
Type - type of community repository;
Repository - URL of community repository.
Also there is only one action button on this page:
Use it - this buttons opens page where you can set project’s name.
Let’s click the Use it button.
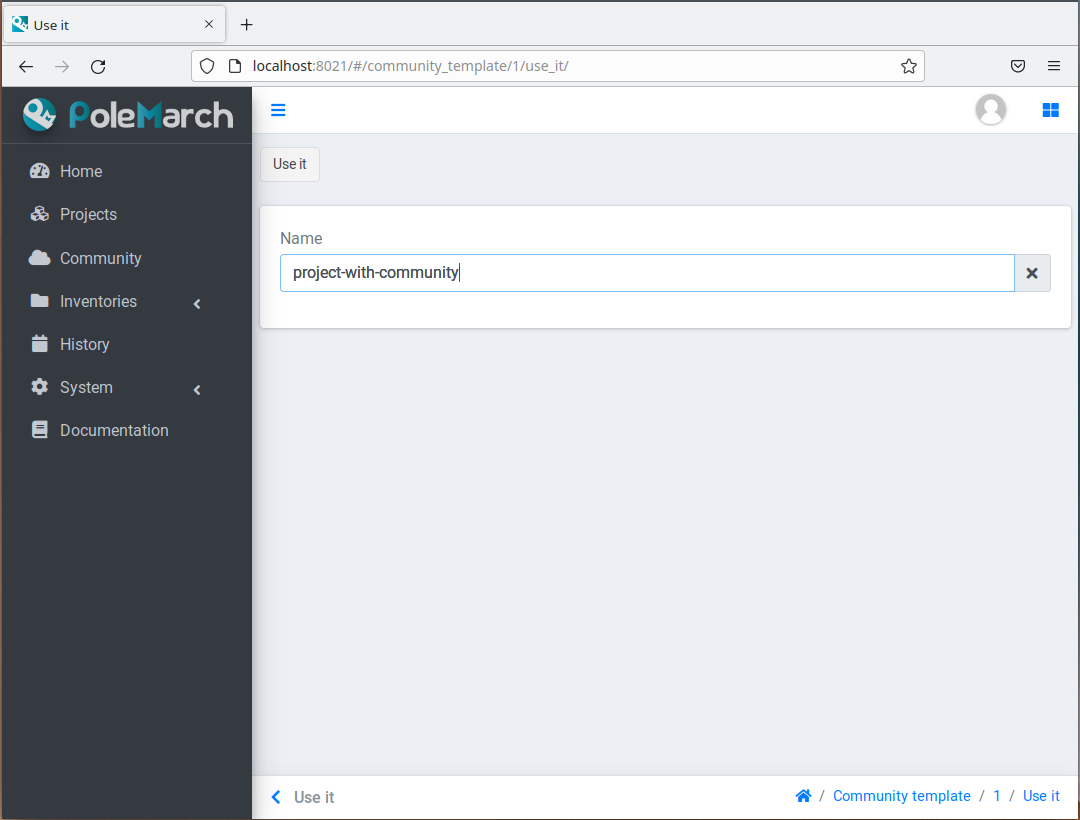
As you can see, this action page has only one field:
Name - name of project, that will be clone of current community repository in your Polemarch. By default it will be name of community repository with UUID.
After that you need to click Use it button once more time and you will be redirected to the page of just created project:
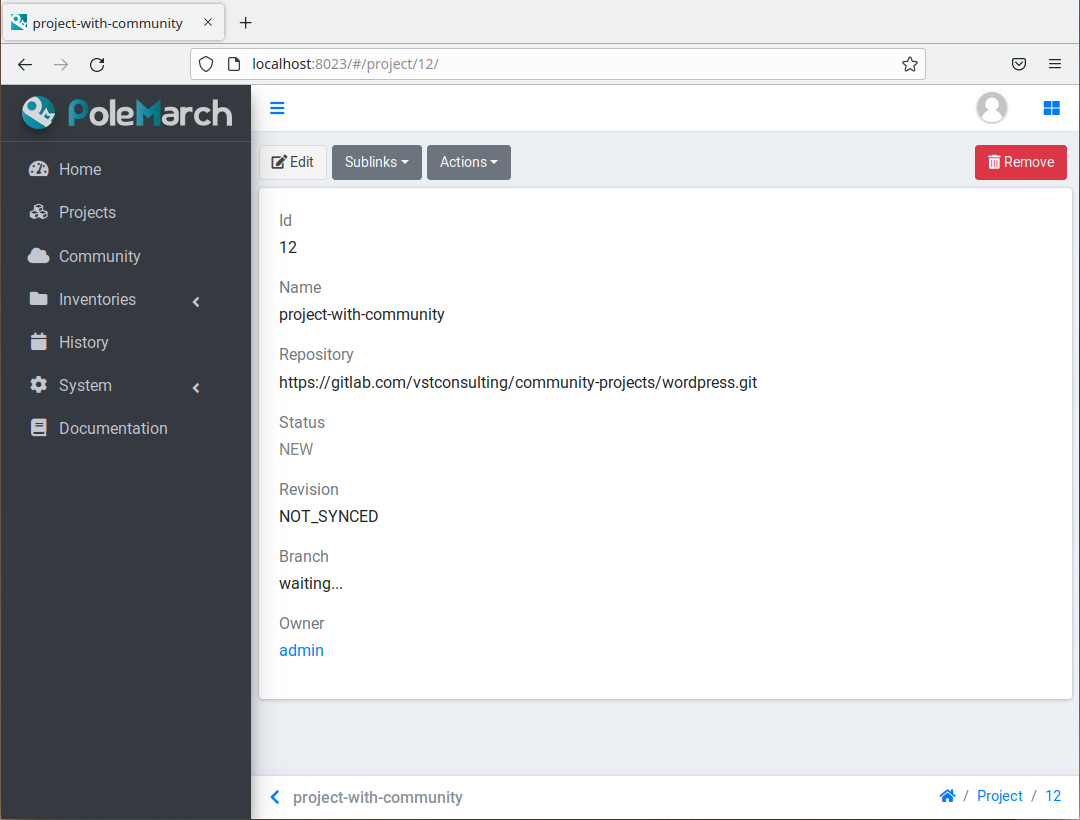
As you can see value of field “Repository” is the same as in “WordPress” community repository.
Then you need to click the Sync button. After project synchronization you will see the next page:
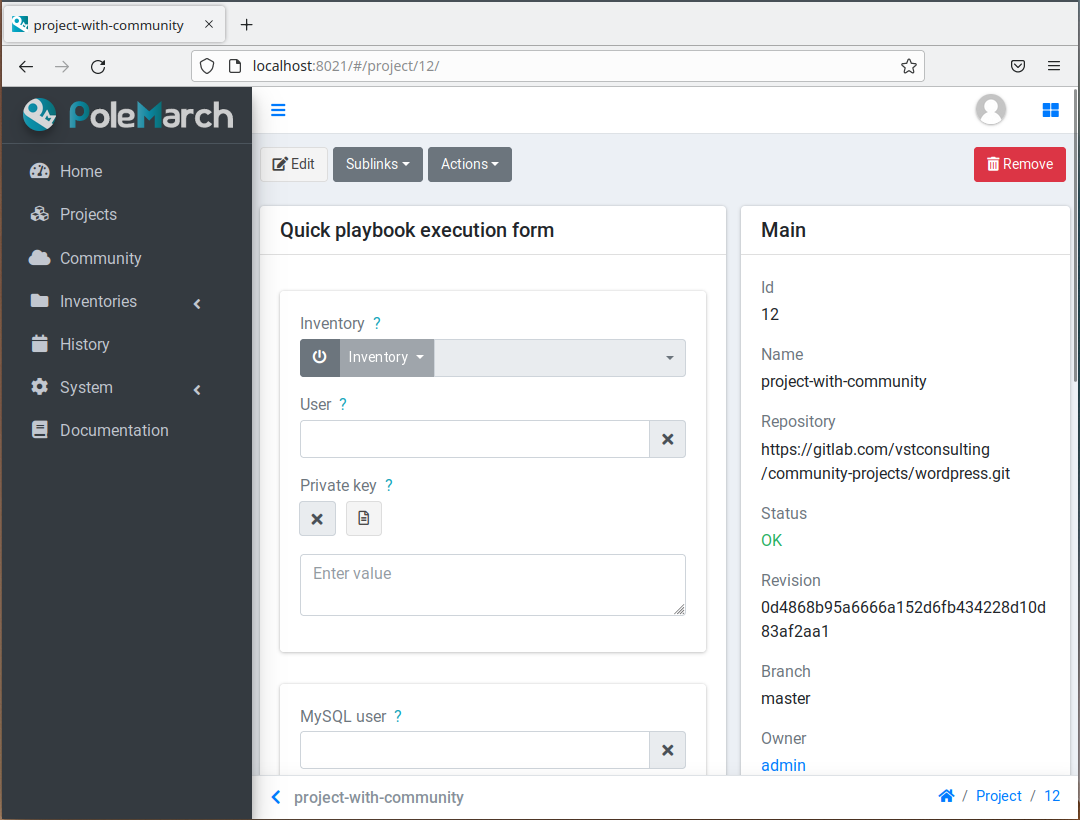
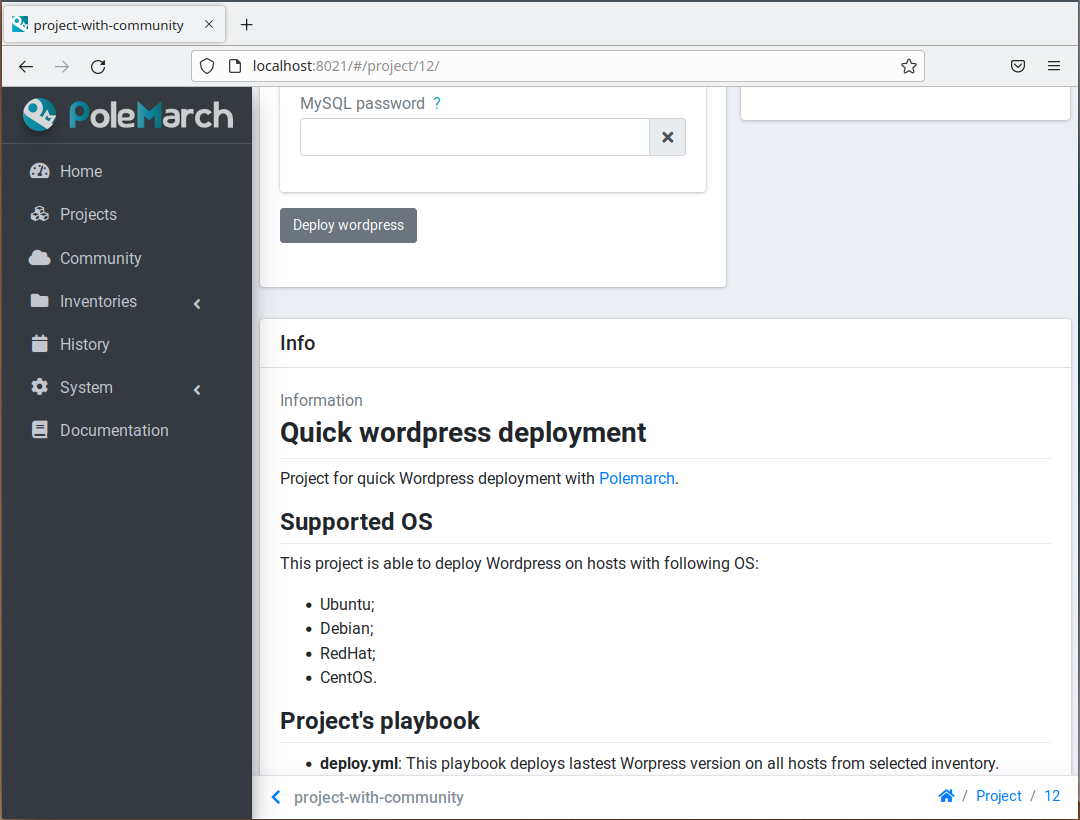
This page has Deploy wordpress button (because project has .polemarch.yaml file)
and all that you need to do for WordPress deployment on your hosts is filling following fields:
Inventory - it can be inventory from Polemarch system, list of hosts, that are separated by
,, or path to your inventory in project folder.User - set it if your do not have
ansible_uservariable in your inventory.Key file - set it if your do not have
ansible_ssh_private_key_filevariable in your inventory.Mysql user - name of MySQL user of your wordpress site’s database.
Mysql password - password of MySQL user of your wordpress site’s database.
After all required fields have been filled, you need to click the Deploy wordpress button to start wordpress deployment on your hosts.
Hooks
Polemarch has his own system of hooks. Polemarch hooks are synchronous and you can appoint them on different events like “on_execution”, “after_execution” and so on.
Warning
You should be accurate with hooks appointment, because the more hooks you have, the more time they need for execution and, finally, the more time Ansible needs for task execution.
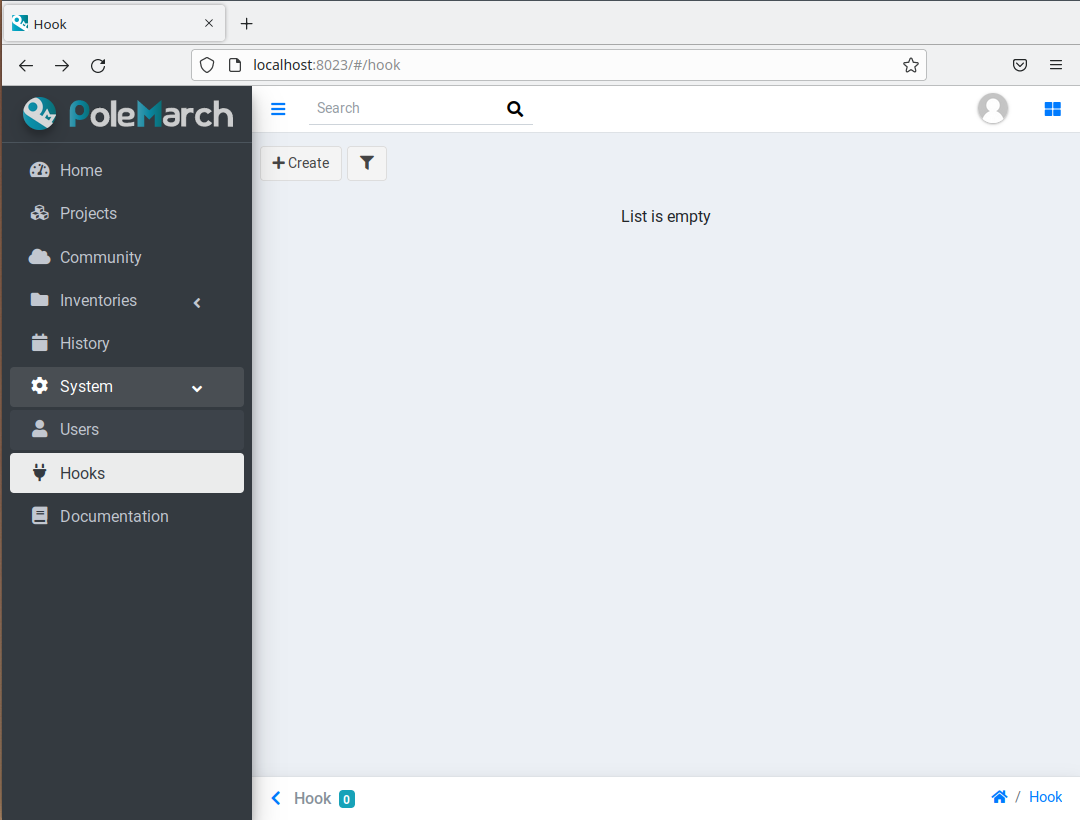
As you can see, there are no hooks in the system now.
There is only one button here:
Create - this button opens the page for creation of new hook.
To create hook click the Create button.

As you can see, the form of new hook creation consists of following fields:
Name - name of your hook.
Type - type of hook (HTTP, SCRIPT). * If type is “HTTP”, Polemarch will send “POST” request with JSON to all recipients. * If type is “SCRIPT”, Polemarch will execute script.
When - event on each Polemarch have to execute hook.
Enable - boolean field, it means to activate or to deactivate hook.
Recipients - if type of hook is HTTP, then this field represents list of recipients, separated by “ | “. For example, “ex1.com | ex2.com | ex3.com”. If type of hook is SCRIPT, then recipients are actually list of files containing scripts, similarly separated by “ | “. For example: “notify.sh | counter.sh”. Files must be in HOOKS_DIR directory.

Users
Polemarch provides you with several types of user:
superuser;
staff.
If you need to create a superuser, you need to do it with terminal command. Look for more information here “Create superuser”.
If you need to create user with “staff” rights you can do it with Polemarch GUI:
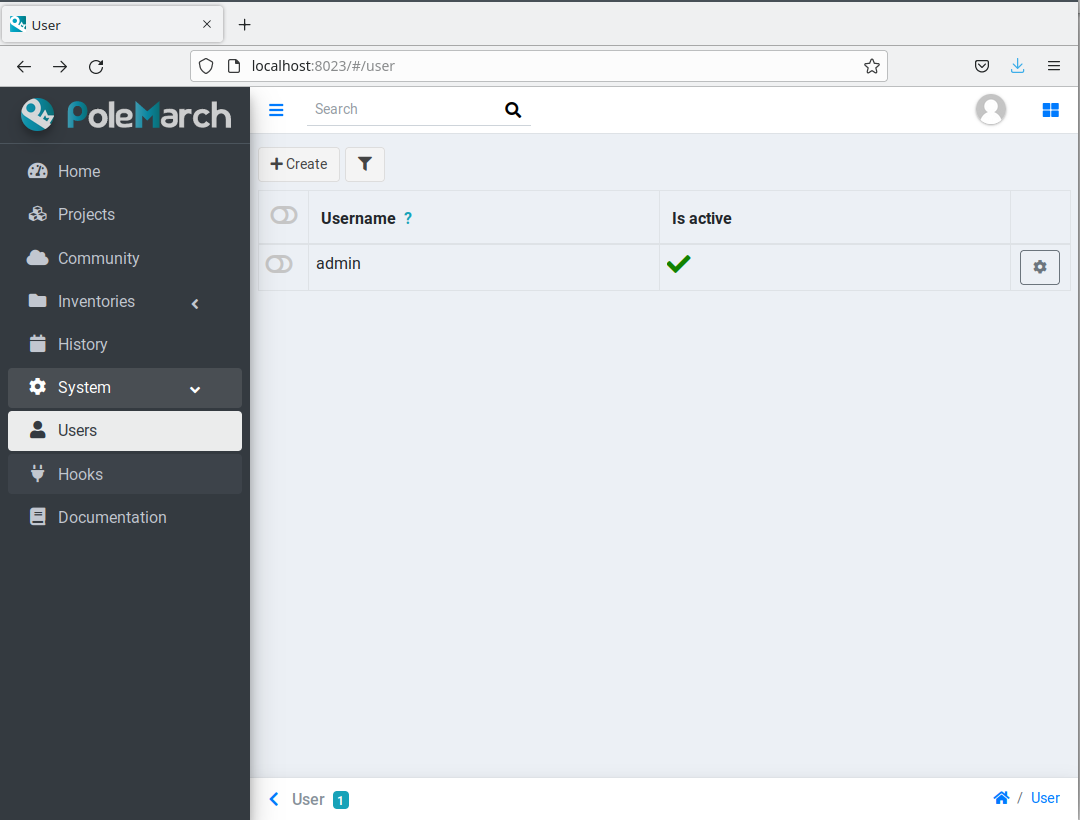
To create new user click the Create button.
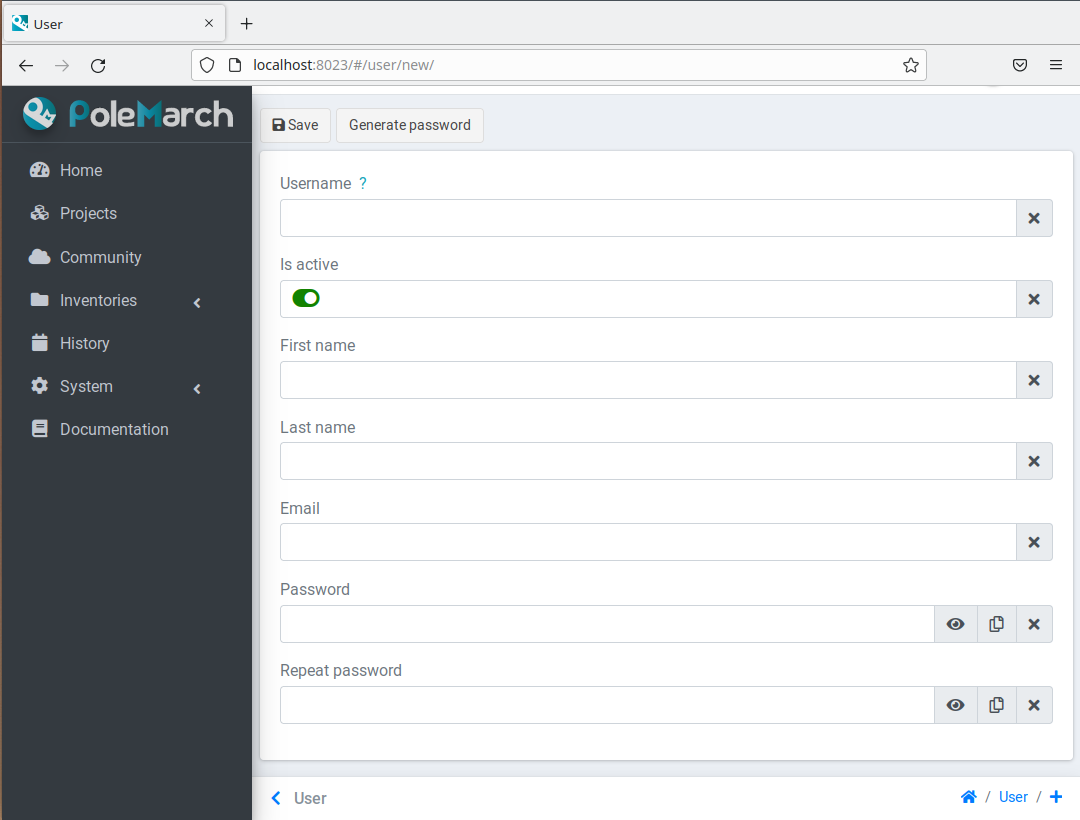
As you can see, the form of new user creation consists of following fields:
Username - name of new user.
Is active - boolean field, it means to activate or to deactivate user.
First name - first name of user.
Last name - last name of user.
Email - email of user.
Password - password of user.
Repeat password - password of user.
Also you can use action Generate password.
Generate password - generates random password from 12 to 20 characters long. Password will contain capital and lower letters, numbers and special symbols.
After user creation you will see next page:
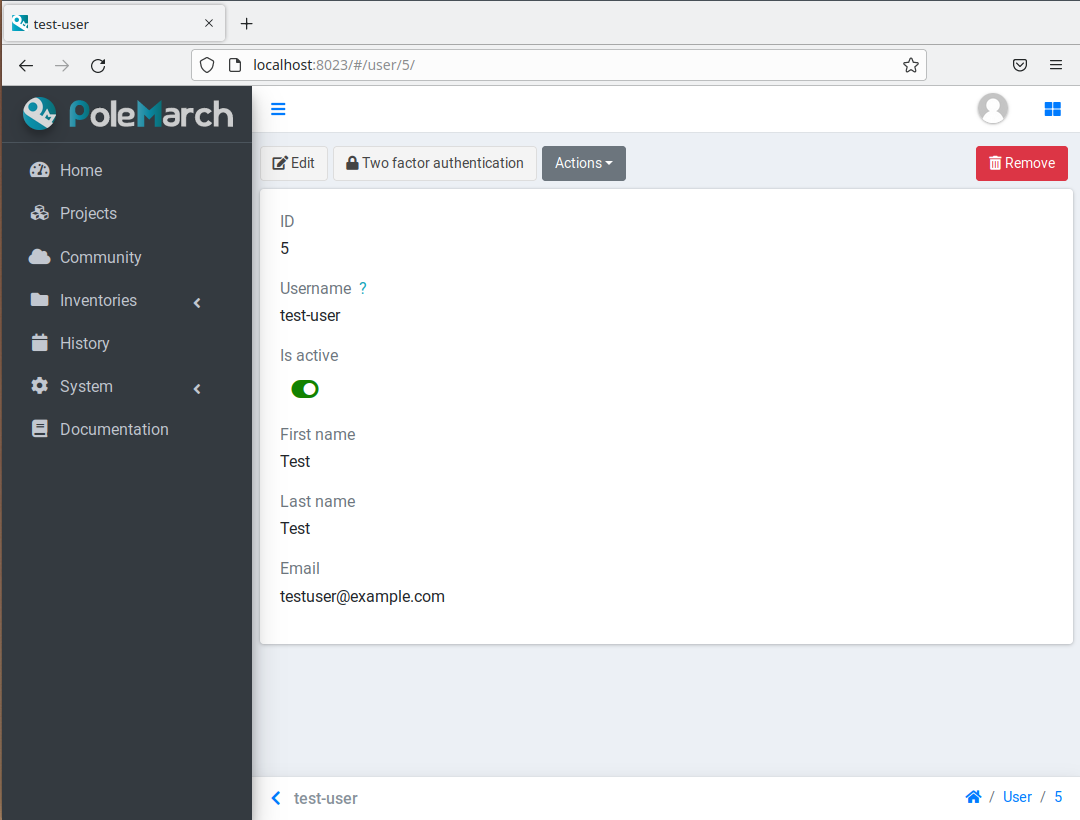
As you can see there is only one new fields on this page:
Id - the unique key of object in database.
Also there are several buttons here:
Edit - this button turns on edit mod for this page.
Two factor authentication - you can use TFA if you want to protect your account.
Remove - this button deletes periodic task.
Action buttons:
Change password - this button opens “change password” action page.
Copy - this button opens “copy” action page.
Let’s look on “change password” action page.

As you can see, the form of “change password” action consists of following fields:
Old password - current password of user.
New password - new password of user.
Confirm new password - new password of user.
There are two buttons here:
Change password - this button saves your new password.
Generate password - generates random password from 12 to 20 characters long. Password will contain capital and lower letters, numbers and special symbols.